Odynovo (5 Stars)-Our Vietnam Trip
This is an extremely important blog post about a trip that wasn’t. Vietnam is on our bucket list so we decided to go in late November of 2018. A friend had just traveled to southeast Asia and recommended Odynovo as travel agent so my wife wrote an email inquiring about possible trip through their website. Within a day, we received a response from a Julia Guo, Professional Travel Consultant, that detailed a proposed trip itinerary with lots of details about what we would be experiencing, accommodations, and costs.

Julia Guo from Odynovo
We fine tuned her proposed itinerary through about 20-30 emails or text messages, all of which she responded to in less than 24 hours. (N.B. Julia was in Guilin, China and we were in Chicago, IL USA). The fine tuning included such things as different accommodations, different sites and different sequence of things. As a small example of changes, on our way home we would have a long lay over in Tokyo and wanted to take advantage of this by seeing a bit of Tokyo. She had a recommendation nearly immediately. Along the way, Julia provided cost estimates based on the changes we had requested. It was as if we had an expert travel agent staying with us in our home and by mid December we had our ‘final’ itinerary!
We were very excited, booked our international flights (Odynovo arranged all of our travel, including flights, in Vietnam), got our visas (with Julia’s guidance), made some additional revisions to the itinerary and started packing. BUT by mid January, the news on Covid 19 was very worrisome and we sought Julia’s advice about our different options (we had already paided in full for the whole trip). Eventually we decided to cancel our trip for safety reasons a few days before we were suppose to leave.
Now this is really important. Although Odynovo was under no legal obligation to refund our money, they did, almost 100%. Julia worked very hard on our behalf and made sure we got most of our money back. And even better, if we use them on a future Vietnam trip, they will apply what little we did not get back to the future trip. It was quite a remarkable and positive experience.
Based on our experience, we have to give Odynovo 5+ stars. Here are the reasons:
1. Very responsive with clear communications
2. A well planned trip
3. An ethical (tries to do the right thing for their clients) business.
We are hopeful that the pandemic resolves and we can travel again. Our very first trip will be with Odynovo, hopefully to Vietnam!
Below are two pages of an early document from Julia, full of details. This made planning for this trip very very easy and clear.


Beaches Negril in Jamaica
I have lived my whole life in the Minneapolis-Chicago-Cleveland part of the world. Nearly 30 years ago, I discovered the health (physical and mental) benefits of spending a week or more in warmer climates during late winter season and in the more recent past, have attempted to instill this ‘secret’ in our kids and grandkids. We have stayed at numerous places: The Cove on Paradise Island in the Bahamas, Captiva Island in Florida, private villas on Isla Mujeres (twice) and Hawaii. All of these were not all-inclusive activities and required lots of additional money and effort for food/drink.
We have now stayed twice at Beaches Negril in Jamaica, once in 2017 and now 2019.
If all you want to do is see some of our pictures, click here.
Our opinion of the place
It is easily a 5 star place and experience. Excellent service, top-notch food and drink, very family and kids friendly, and favorite of our whole family. Simply can’t be beat, and a place I could come back to every year. If you want to know why, read a few details below. Otherwise you can visit their website.
Our group is a bit large with 11-13 people with a couple of over 65 people, several late 30-mid forty individuals and then 4 young boys (less than 12).
Travel
We all flew into Montego Bay. We had elected to use Club Mobay. They greatly facilitate the arrival process and minimize the hassle of long lines. On departure, it does not seem as helpful, but perhaps that is not always true.
The airport is relatively small and can be crowded, but as airports go, it has a fun, relaxing vacation type of feel.

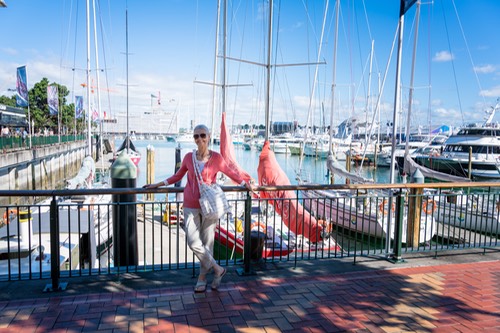
Leaving Montego Bay Airport on our way to Beaches Negril
The bus ride to Beaches Negril is about 2-2 1/2 hours, on winding and sometimes a little bit bumpy road. If you are prone to motion sickness, you may want to premedicate, but other wise the ride is quite comfortable. Along the way, you will get a glimpse of a Jamaica different from your experience at Beaches.

Jamaica Market near Lucea, Jamaica
Upon arrival at Beaches, we were escorted into the Concierge check-in, offered drinks and got our rooms. Because we had four rooms with different arrival times, it was a bit complicated but Krystal (Concierge Manager) and Genette(Front Office Supervisor) sorted things out and we quickly departed for the beach to wait for the rest of the family to arrive.

View from chaise (Hard to beat this)
Before I get distracted by the gorgeous beach, I should mention the rooms. We stayed in beach front rooms in the Savannah Building. The rooms are fairly large and quite comfortable. In between the two sides of the building is a lovely garden which hosts, during evening hours, many singing frogs.

Several of the first floor rooms were recently remodeled so one can walk out beachside from the rooms, an excellent improvement. There is a safe and refrigerator stocked with water, juice, wine, and beer and they will bring anything else you want. But you probably will not spend much time in the room as the beach experience is simply fantastic.

Looking south at Beaches Negril
I understand it is possible to walk from here to Negril along the beach and adults might like to make the walk.
Some of the activities
For kids there are many safe and enjoyable activities, a big reason why Beaches is such an outstanding place to vacation. Below are just a few examples of things available.
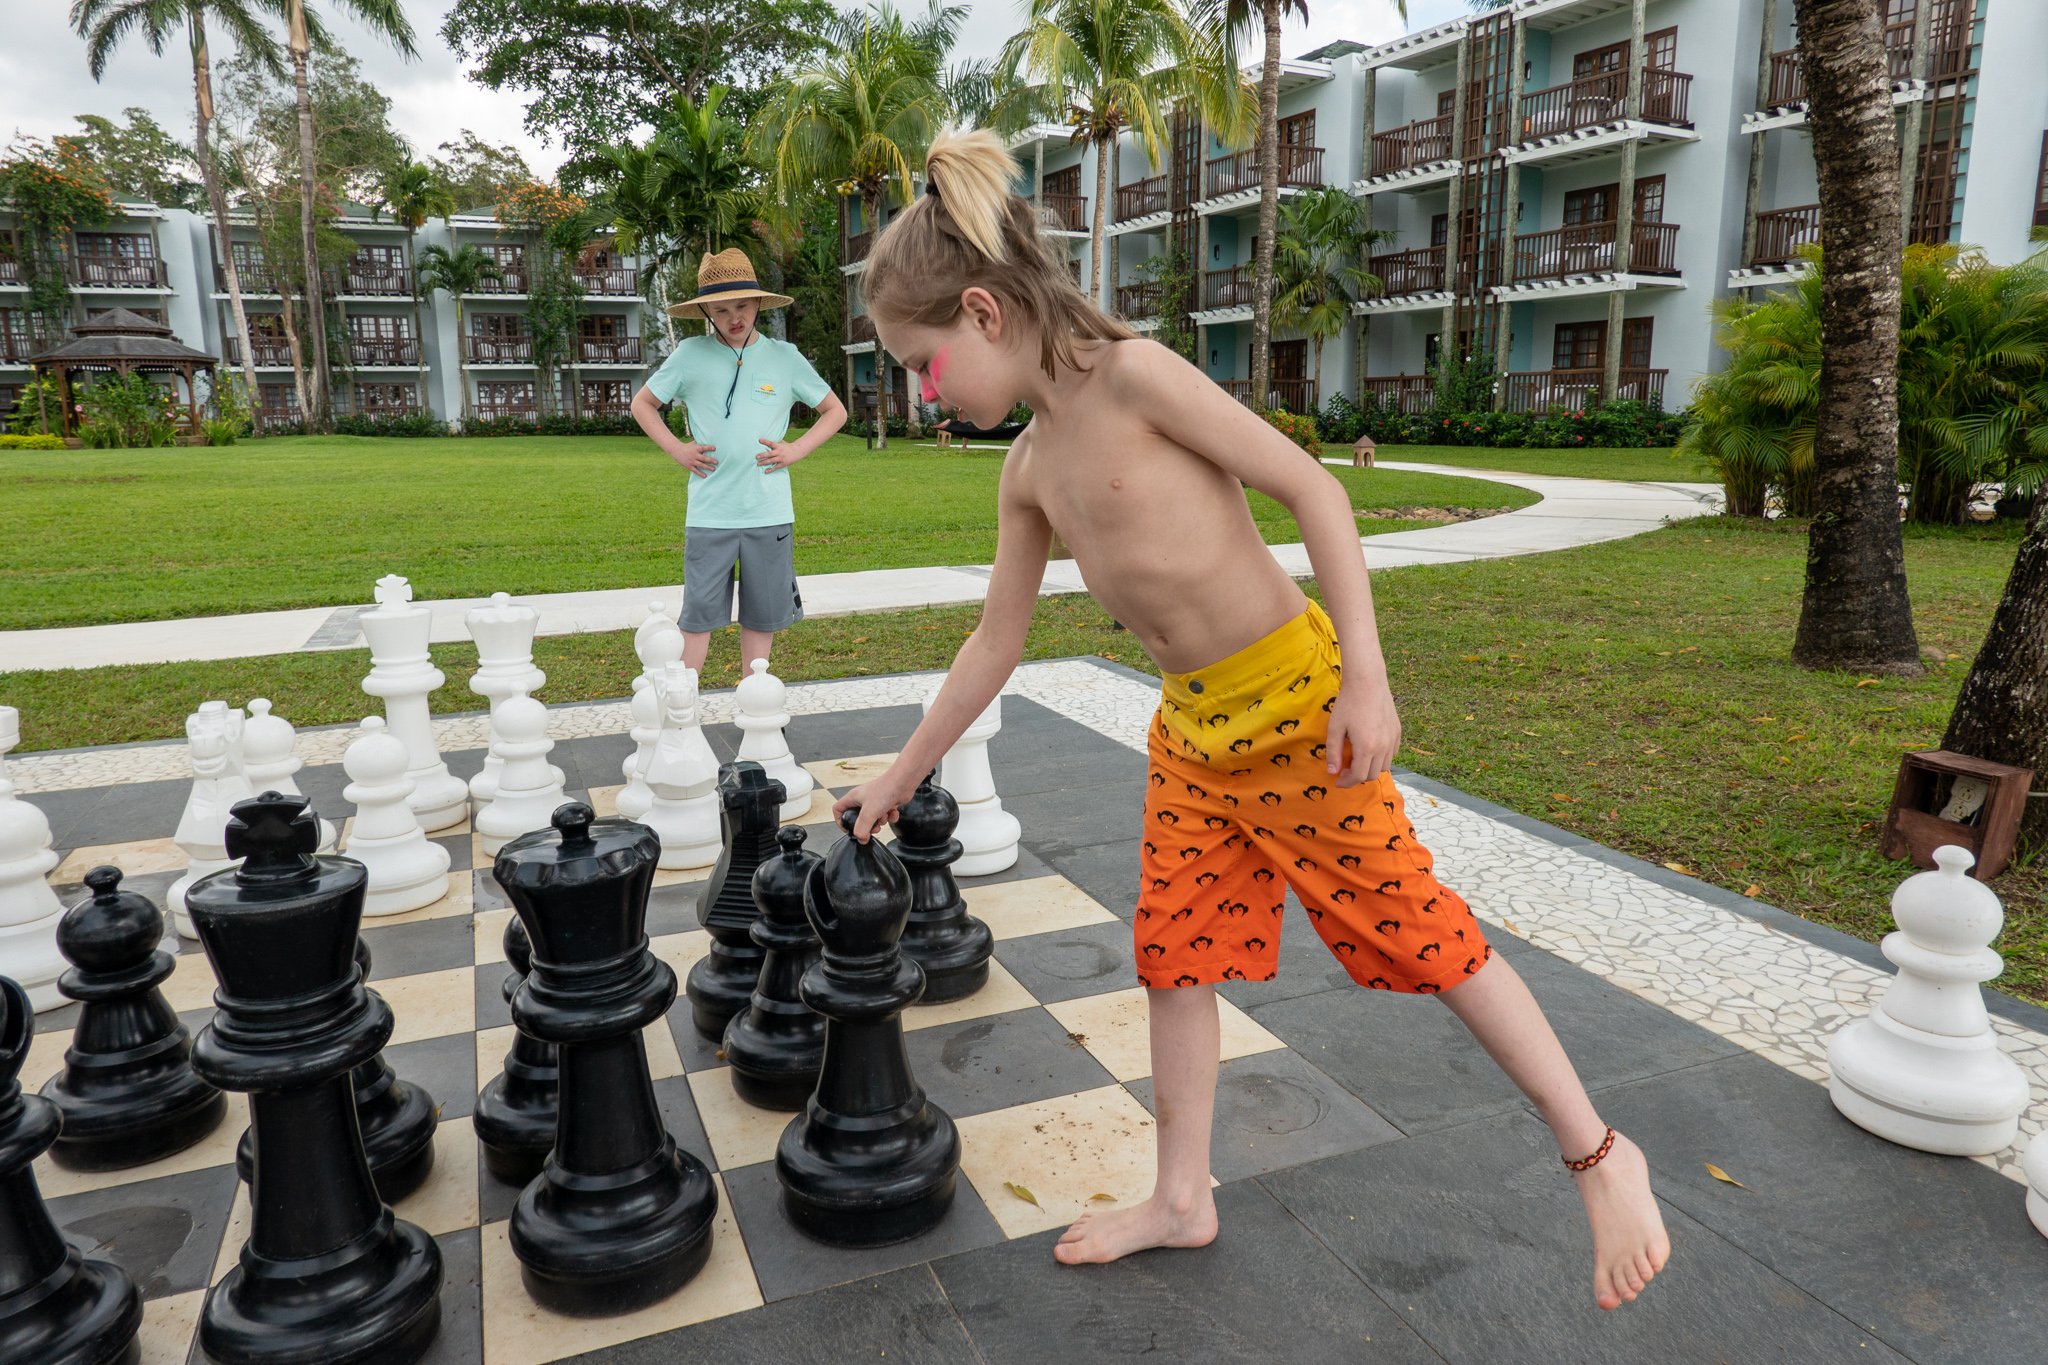
Chess and shuffle board in front of Montepelier Building at Calypso Cove

Playground just outside of the Savannah Buildings
A minature golf course, basketball and sand volleyball courts are just a few of the other activities available to keep the kids entertained.

Lazy River at Beaches Negril

Bucket Dump at Beaches Negril

Two water slides make for endless fun

The large swimming pool
There is also a smaller, more shallow. Both pools have a swim up bar. Nearby is YoYo’s (a great ice cream parlor) and Bar,B. Q Park (a great snack place).

Cabanas on the beach
We reserve a cabana for a number of reasons, but most importantly it serves as a gathering place for the family, it is right on the beach, offers protection from the sun and comes with a server that makes sure all your needs are satisfied. For a really relaxing time, it is the way to go.

Building sandcastles: a favorite past time

Rent a hobbie cat or catamaran!

Taking a dip while parasailing
This can be arranged from vendors walking the beach. It is a lot of fun and lasts about 15-20 minutes. If you want to record your adventure, bring your GoPro (or equivalent) and make sure it is well attached to you.

Beach Vendors
You can purchase a variety of memorabilia and services from beach vendors, but they are not supposed to leave the shoreline. Our experience is they are pretty mellow people.

Beach Play

Take a plunge
Everyone mentions the beauty of Seven Mile Beach, and that is true, but the ocean is just as spectacular, crystal clear, warm, soft sandy bottom and some nice waves. Great for taking a dip or a swim.

Walk up kids drinks
There are lots of places for kids to get drinks of an infinite variety as well as food when they are hungry. Certainly our grandkids enjoyed that freedom.
During the evening, there is family oriented entertainment from a ‘Big Top’ Show with local talent to an outside barbecue buffet with different stage acts. The acts are always enjoyable and they really engage the audience, including the kids, to participate. It makes for a lot of fun.


Finally, there are a substantial number of off resort activities that can be arranged, although we have not taken advantage of these activiities.
Staff
On both occasions, we always found the staff to be very friendly and willing to help. Many times, they would address us by name and would remember conversations from earlier in the visit. I think this is best exemplified by an example. The Concierge Manager, Krystal, was busy helping someone else and when she saw us, she came to greet us by name, welcoming us back and even remembered some details from our previous visit. Pretty amazing.

Krystal, Concierge Manager
The second remarkable observation is the senior management was commonly seen walking around the resort talking to guests, making sure everything is ok, but also making a more personal connection to their guests. It is an opportunity to learn about their lives and to share some of yours.
When we arrived at the resort, a commonly used phrase was ‘Welcome Home.’ This phrase really resonants because of the close personal attention from the managers and staff.
Food
For an all inclusvie resort, the food is quite good and clearly a significant step above of other all inclusive place we have stayed. Our favorite places include:
Soy-Simply great sushi. Small so get there early.
Cafe de Paris-Our regular meeting place in the morning for delicious coffee and pastries.
Dinos-Excellent pizza and certainly a favorite of the grandkids.
The Mill-An amazing collection of delicious alternatives that change daily, served buffet style, breakfast, lunch and dinner.
Mariachi-Great Mexican food and our favorite for lunch.
Bar.B. Q-Really good snack food.
Stew Fish-A romantic dining experience with fantastic sunsets on the beach.
YoYo’s-an icecream palor and certainly a daily favorite of the grandkids.
For drink, the house Premium wines are generally pretty good and there are several bars serving a huge variety of alcohol and non-alcoholic beverages.
And when all you want to do is relax after a busy day, sit and watch an incredible sunset, perhaps with a glass of wine and dinner at Stew Fish.

Photography
The resort has a group of photographers available and you will see them taking pictures. These are available at a shop on the resort.
But for me, I like to take my own pictures and travel photography creates some issues. I have tried many different variations and most of them have worked, but for this trip, I think I have stumbled on very good combination.
Cameras and gear: Two Sony a7RII, Sony RX100M6 and a GoPro Hero Black with multiple lenses and a small flash
For this trip I used two carry on bags: a Think Tank Photo Airport Advantage Roller Carry-On Camera Bag and Think Tank Retrospective 20 x 1 that I carried on top of the roller bag.

Think Tank Airport Advantage Roller
Remarkably there is sufficient room to have a third a7RII with the 16-35mm f4 lens attached. So with the combination of zoom lenses and fast primes nearly all photgraphy challenges can be met. Also in the bag is a Vello ShutterBoss II RC-S2II from www.vellogear.com and a small flash, Nissan i40. In the external pouch, I carried a 15 inch 2018 MacBook Pro with 2 TB internal SSD drive.

Retrospective 20x1
There are four basic compartments in the Retrospective. The back compartment where printed documents and an iPad can be carried and the front compartment where a GoPro Triple Selfie stick with iPhone adapter and medicine trays can be carried The middle compartment is divided into two sub-compartments, a larger one holding the BUBM case (www.bubmcase.com) and a smaller one to hold miscellaneous items important to have with you.
Inside the BUBM case are various important gadgets:
1. Pelican 12 card case with 12 Sandisk 64 GB 300 MB/sec cards
2. Lots of batteries: 5 NP-BX1 for Sony RX100M6 and 8 NP-FW50 or equivalent (RavPower RP-PB056 Savior Series) for the a7RII and GoPro batteries.
3. Battery chargers: GoPro charger (Mibote-GP-BCG-503), Sony RX100M6 (Newmowa CHG-NPBX1-NMW, Sony a7RII (RAVPower RP-PC056 Savior Series). All of these chargers were micro USB based and would charge 2-3 batteries at a time.
4. A 6 and 10 stop neutral density filter, and a 72 to 77 step up ring from Breakthrough Photography.
5. Two SDXC USB 3.1 USB C card readers from Cable Matters (Model 201058)
6. USB C to B adapter from Aukey
7. iPhone shutter release from Camkix.com
8. VisibleDust Zeeion blower for sensor cleaning from www.visibledust.com
9. Western Digital 2 TB My Passport SSD (USB C)
10. Various cables
There are a couple of reasons why this combination of bags works so well. First, with the separate Retrospective bag I can have all my personal items and medicines with me all the time. Second the roller bag makes moving through the airport considerably easier. Lastly, once we arrived at our destination, the Retrospective can be quickly unpacked and used to carry two camera bodies with lenses attached, some extra batteries and cards for local excursions.
Workflow
At the end of each day, the images from the day were transferred from the SDXC cards to the MacBook Pro internal drive. They were index by a 10 digit number YYMMDDxxxx, where YY is the two digit year, MM is the two digit month and DD is the two digit day and xxxx is a sequential number from 1 to 9999, as they were imported into LR CC. Following import, the MacBook Pro was backed up to the WD 2 TB My Passport SSD using Carbon Copy Cloner and if the SDXC cards were full or nearly so, they were locked and stored in the Pelican case. With this approach I had three copies of each picture at the end of the day.
Antarctica 21(5 stars)
This is a subsection of our larger blog “OutsideGo-Awasi Patagonia-Antarctica 21” that comments specifically on the Antarctica portion of our trip. If you just want to see our pictures from Antarctica, click here.
Visiting Antarctica has always been on my bucket list and my 7th continent. It is not top of the list to escape the long, cold Chicago winters, but rumors suggested a visit would be a remarkable experience. We had received an email from OutsideGo about Antarctica 21 and given this was on my bucket list, we began exploring the possibility. We always pay attention to OutsideGo emails!
General considerations: (5 stars)
There were two very significant reasons to visit Antarctica through Antarctica 21. Instead of sailing the Drake Passage (a 2 day trip), we would fly from Punta Arenas to Teniente R. Marsh Airport at Frei Station on King George Island. This saved two days of travel and avoided the potentially very rough Drake Passage trip. The second reason was the small size of the tour group (maximum 71). This allowed everyone to leave the boat (Ocean Nova for us) at each activity, multiple times daily.
They also offered kayak and snowshoe outings. We did not participate in those activities, but the individuals who did really enjoyed them.
Pre-tour communications and arrangements: (5 stars)
Once we decided to use Antarctica 21, we received a web link that provided a tremendous amount of information in the form of videos and pdf files including clothing requirements, sunglasses recommendations, accessories, guidelines for zodiac and land visits, contingency plans (weather can cause delays), photography tips, access to the internet and many other useful things.
When we arrived at Hotel Cabo de Hornos, we had our boot fitting (heavy rubber boots for wet landings), a detailed orientation of the trip and then a pleasant cocktail hour and dinner with the people going on the trip with us.

Cocktail hour at Hotel José Nogueira the night before departure to Antarctica
It is very important that your boots fit correctly as walking on the snowy continent can be challenging, otherwise.
This is perhaps the best pre-tour communication we have ever experienced.
Communications during the tour: (5 stars)
There were two to three briefings a day between the two daily outings and meals. These briefings included plans for the next day, recaps of the day’s activity and a number of presentations about Antarctia that greatly enriched the experience, such as knowledgeable discussion of the role of phytoplankton in the life cycle in the Antarctica, the origin of Antarctica as a continent, or thoughts and data on current global warming issues. There were also public announcements of activities planned or beginning.
The expedition guides and crew were very knowledgeable, worked hard to insure the safety of the passengers and to educate us about Antarctica. Several of them stand out: Alcibíades Ulises Barrios Herrera, Captain; Karen Parada, Cruise Manager; Hadleigh Measham, Expedition Leader; André Belem, Education and Science Coordinator; Ashley Cooper, Expedition Guide-Photographer; Rodrigo Moraga, Marine Biologist-Photographer; Allison Lee, Polar Specialist-Oceanographer; Jamie Watts, Expedition Leader-Marine Ecologist. All the other guides/crew were equally outstanding. Captain Herrera safely guided our ship through iceberg filled waters and did an incredible job in the Icebird rescue. Both Ashley Cooper and Rodrigo Moraga gave the whole cruise some of their spectacular images, including breaching whales and Ashley gave a wonderful pictorial presentation on the consequences of global warming. Hadleigh Measham did an excellent job communicating ever changing plans for the day, pleasant wakeup music and messages and selecting the best possible sites for us to disembark from the Ocean Nova. Finally, Allison Lee led several fascinating discussions on phytoplankton and her citizen science project sampling phytoplankton. André Belem lead the education and science team that provided a variety of wonderful discussions that greatly enriched the Antarctica 21 experience. We have remained in contact with André via email and he has been extremely helpful refreshing my memory of different parts of the cruise. For this we are deeply grateful.
Accommodations: (It’s an icebreaker ship cabin!)
We have not provided any stars for this category. Our cabin had a small desk, two beds, a bathroom/shower of about 10-12 square feet with a very tiny shower and a small closet. The total cabin was about 100 square feet with a number of hooks to hang clothes. Over the desk were several electrical

Ocean Nova Sleeping quarters
outlets (standard European round two pin plugs) and USB charging outlets. We adapted to the space quite well, but we have not rated it as we have no basis of comparison. Given that we were on a boat, we suspect these were pretty good accommodations. There was also a physician onboard that proved very useful: gave us some great sea sickness medicine (dramamine was insufficient) and counseled/reassured me on a nasty pulled hamstring.
What was seen/experienced: (5 stars)
It is important to appreciate the fact that this experience is highly planned and yet unplanned. As we set out, the expedition manager, Hadleigh, enlightened us by telling us about the highly variable weather and how they would try to find interesting places to visit that had reasonably acceptable weather conditions. At the end of the day, there was a rough sketch (or to be determined-TBD) as to where we might visit the next day, but that depended on how the weather was the following morning. When we arose for breakfast and morning briefing, we knew more or less what we would be experiencing that day.
This planned/unplanned character was highlighted our first evening, before departure, in Punta Arenas. If and when we would depart to King George Island was announced during our pre-departure dinner, roughly 12 hours prior to our actual departure. We had to be fully dressed for Antarctica prior to boarding the plane, including our Antarctica boots and water proof pants. This made for a toasty ride to airport, but once on the plane, heavy coats were removed. This seemed a bit crazy as we were from Chicago and quite used to blustery winter weather.
The flight from Punta Arenas to Frei Station was about 2 hours. Our approach was heavily overcast, but we could see some land and ‘rocks’ in the water. Upon exiting the plane, we were greeted with a blizzard, horizontal snow and biting cold. We knew we had a 40 minute walk, single file on a muddy, puddle filled make shift road to the zodiac boarding location. First impression: ‘Oh my god, how bad is this going to be’ and ‘how strikingly barren the landscape really is’.

In front of our plane. Smiling, but see those white streaks, giant snow flakes at 1/320 of a second, they were moving that fast. Very cold.

First impression of Antarctica: a god forsaken place
We were given a life jacket at the zodiac landing (we kept this for the rest of the trip) and refreshed on how to get into the zodiac. In all of the training videos, the zodiac was calmly resting on the shore. Not now. The zodiac bounced and lurched from wave action and made entry considerably more challenging than anticipated. The ride to Ocean Nova and transition from the zodiac to the boat was a rolling adventure. The seaman grip proved to be very useful!
Once on board, we explored a bit and settled into our room. Once everyone was on board, we had our first briefing in the Observation Lounge and set sail from Frei Station out of Maxwell Bay into Bansfield Strait. We passed a large tabular iceberg, A57A (12.7 by 5.8 miles in size), and many ‘smaller’ ones as

A ‘small' iceberg in front of A57A. The bright mid portion of the sky is caused by light reflected off of A57A.
we had a training drill for using the two life boats. The sheer beauty rapidly changed our first impression. Sea sickness set in as we went further out into the Bansfield Strait, effectively treated with Marezine from the onboard physician. To see all of Day 0-2 pictures, click here.
Sometime overnight, we entered the Gerlache Strait, the waters calmed and we were joined by a family of Humpback Whales. They swam with us for quite a while, affording an opportunity to get some nice photographs. Our

Humpback Whale in Gerlache Strait, Antarctica
first zodiac excursion was at Portal Point, a true Antarctica continent landing. The rocks were slippery with a steep drop off. The sailor grip and our walking sticks were very helpful on this landing. We climbed up a hill along a

Hiking back to Portal Point with zodiacs waiting to return us to the ship

A matter of perspective: Ocean Nova vs. iceberg on our way back to the ship
red flag marked path to experience a snow filled view. It was important not to stray from the path, as one or two steps off the path could result in sinking to your hips in snow!
As we headed further into the Gerlache Stait toward Useful Island, we were joined by a pod of Orca Whales. We were able to get some nice pictures from

Orca Whales in Gerlache Strait
the observation deck, but it was very cold. Two layers on the bottom, 5 layers on top, a Columbia Titanium Omni Heat Hat with hood and two layers of glove was sufficient. The inner fleece glove worked well with the camera and kept the hands warm enough for a short period of time.
Useful Island: Gentoo Penguins were everywhere at the lower level and Chinstrap were higher up. We were very lucky to see young penguins as they typically bred earlier, but in the case of first chic loss, they will lay more eggs.

Gentoo Penguins with young chicks on Useful Island
Both parents care for the young and feed by regurgitating food into their beak while the chick gathers the food by inserting their head into the parent’s mouth. The other quite remarkable experience is the overwhelming pungent odor that can be smelled a distance away and adhers to your clothing on return to the ship. To see all the pictures from Day 2, click here.
Lemaire Channel: The decision was taken the evening before to try to make passage through the Lemaire Channel. This attempt was going to be the first for the season by any Antarctica cruise. The channel is ice filled, approximately 7 miles long and only a half mile wide at the narrowest point.

Icy and narrow entrance of Lemaire Channel
The waters are very still, reflecting the mountains and glaciers on the side for incredible sites. Our zodiac trip in the morning was to cruise through the icebergs, photographing seals, penguins and birds. Weddell, Leopard and

Crabeater Seal in Lemaire Channel
Crabeater seals were seen. At one point, we hopped out of the zodiac onto a 50 foot around flat (pancake) iceberg. While we were taking pictures on the iceberg, a few penguins jumped on, quite surprised we were there and quickly jumped back off.
As we enjoyed the icebergs and seals, the bridge received a state of urgency call (pan-pan) from a small 61 foot yacht, Icebird, requesting assistance. Our boat captain agreed to come to their aid. Our initial thought was to wonder why such a small boat would be in these perilous waters, but Icebird is specifically designed to operate in these conditions and the crew is highly experienced. They suffered a most unfortunate motor failure. We arrived,
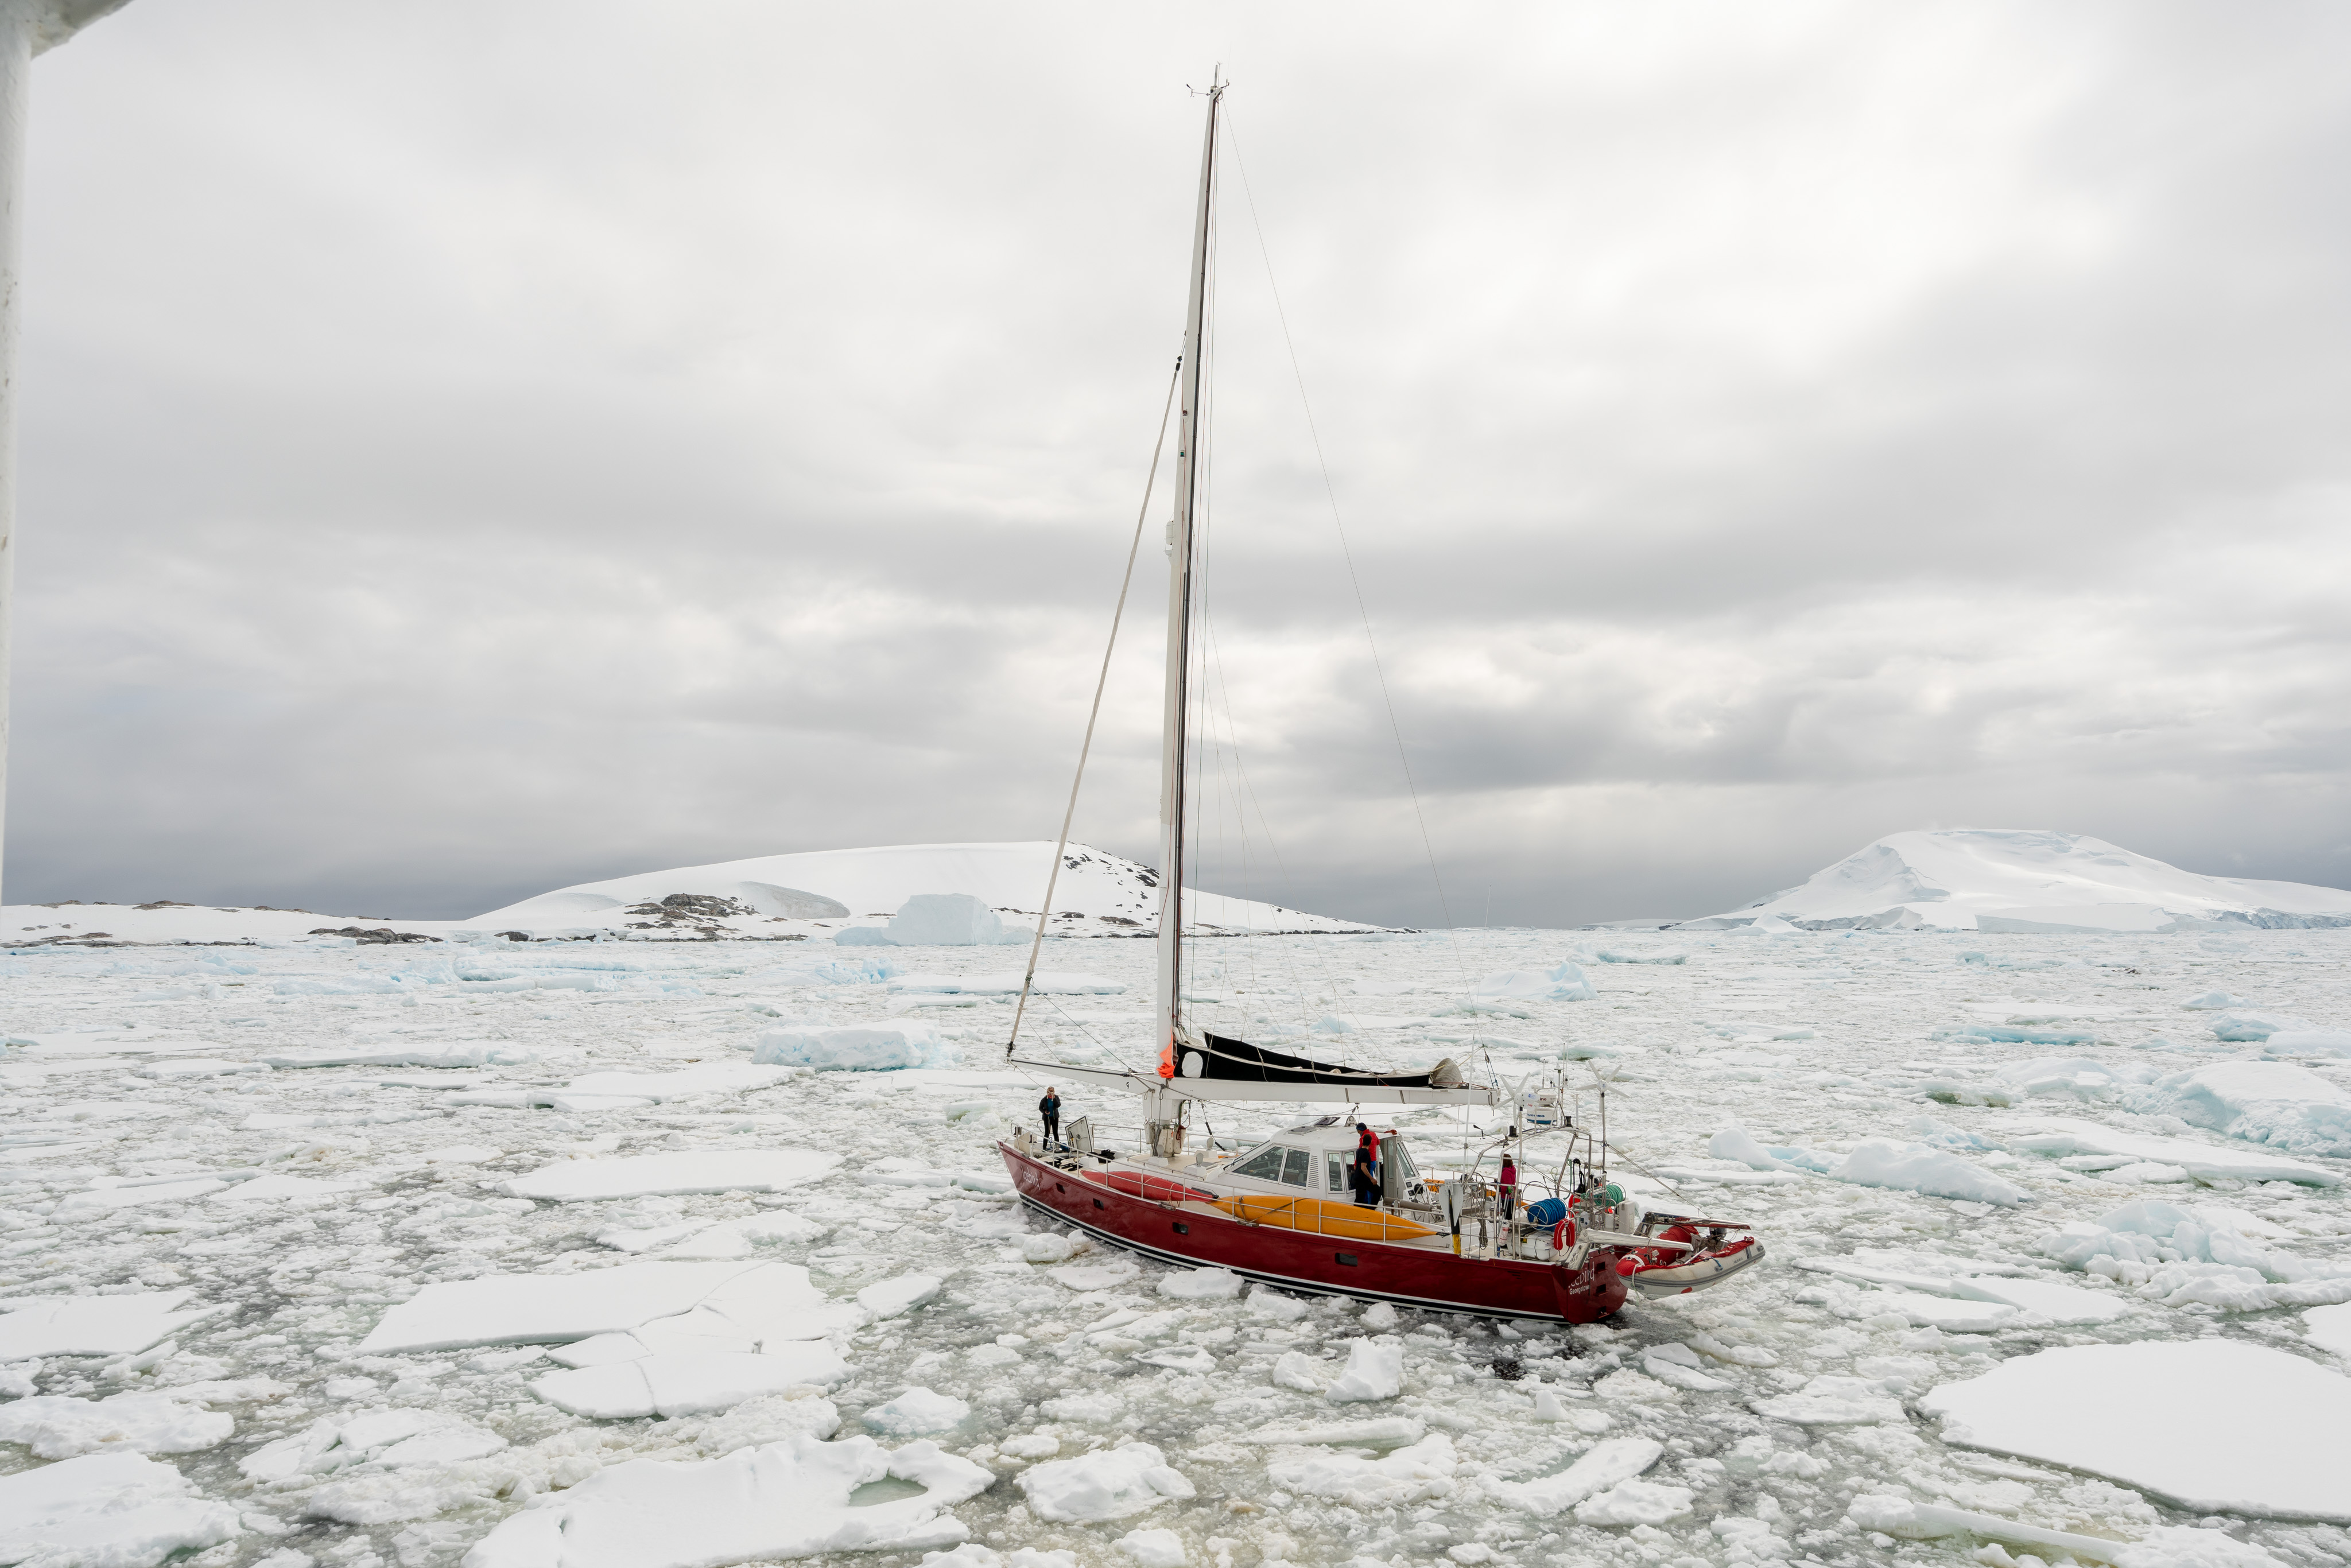
Icebird trapped in ice field after motor failure
place a tow line, and then pulled them through considerable ice to the Vernadsky Station, a Ukrainian research base. The station was to send zodiacs out to the boat, bring the crew on shore, so they could use the machine shop to effect repairs on the motor. That was a solid plan with the exception that the ice was so thick, the Ukrainian zodiacs could not make it to the Icebird. We reattached Icebird and proceeded to tow it back through Lemaire Channel to Base President Gabriel González Videla (Chile). To see all of our pictures from Day 3, click here.
Neko Harbour: This was our second continental landing. The harbour was discovered by Adrien de Gerlache during his Belgian Antarctic expedition (1897-99). It is named after the Norwegian whaling ship, Neko, which often used this bay. A prominent feature is a large glacier which sometimes can be seen calving that caused very substantial waves at the landing beach. Because of this we were warned to not stay near the beach area. We heard, but did not see, some calving. The large glacier and the approximate 250 breeding pairs of Gentoo penguins made for some great photography.

Gentoo Penguins at Neko Harbour
Whilhelmina Bay: Our second zodiac excursion on this day was to join, up close and personal, a group of Humpback Whales. We saw many tail flips and a few actually had whales come up by the zodiac! The water level

Humpback Whale in Wilhelmina Bay

Humpback Whale in Wilhelmina Bay
perspective of whale tails flipping out of the water with glaciers and snow-covered mountains in the background etched a permanent memory as to how vibrant, magnificent, and yet isolated Antarctica truly is. To see all of our pictures from Day 4, click here.
On our next to last day, we visited Deception Island, landing at Whalers Bay and Half Moon Island. Deception Island is an active volcano, last erupting in 1969. The caldera is filled with sea water to form Port Foster. The entrance is called Neptune Bellows, a narrow, 755 foot wide passage into the sea filled caldera, and just past this point is Whalers Bay. The Whalers Bay community was established in the early 19th century to serve the whale oil industry, where the blubber was converted primarily to whale oil for lamp burning. Large rusty tanks that held processed whale oil still stand, highlighting how

Whaler Bay and whale oil storage tanks in disrepair
aggressively whales were hunted in Antarctica in the earlier part of the 19th century. Kerosene eventually displaced whale oil and international protections in 1966 prevented the hunting of whales. These have helped stabilize and encouraged recovery of the whale population. We also saw a wonderful example of a Fur Seal.

Fur Seal at Whalers Bay
Our last stop was Half Moon Island, a beautiful island with lots of wild life, in particular Chinstrap penguins. The general rule is to not get closer than 15 feet, but the Chinstraps did not know this rule and would frequently waddle

Chinstrap Penguins on Half Moon Island walking right past us
within a few feet of us standing perfectly still. This created some great opportunities for very close photographs. There is a photogenic wrecked whaling boat on the beach. To see all the pictures from Day 5, click here.

Wrecked whaler boat on Half Moon Island
We returned to Frei Station overnight where we could get an Antarctica immigration stamp for our passports. Once everyone had disembarked the Ocean Nova we hiked back to the landing field and waited for our flight back to Punta Arenas.

Leaving Antarctica from Frei Station
With this description and accompanying pictures, we hope the 5 star rating is understandable. Antarctica is extraordinarily beautiful and sharply different than anywhere else in the world. The magnitude of the sheer raw forces of nature are difficult to explain. To see all the pictures from our last day in Antarctica, click here.
Food: (5 star)
The good food on Ocean Nova greatly exceeded my expectations. The breakfast and lunch were buffets with diversity of choice and always something good to eat. For dinner, salads/cheese/crackers were buffet, but the dinner was ordered off a menu and served to you. A variety of beverages, including wine/beer, were available. The dinner meal was consistently good quality and again exceed our expectations.

Example of Ocean Nova Menu
Awasi Patagonia (5 stars)
This is a subsection of our larger blog “OutsideGo-Awasi Patagonia-Antarctica 21” that comments specifically on the Awasi Patagonia portion of our trip. If you just want to see our pictures from Awasi Patagonia, click here.
General considerations, pre-tour communication and arrangements (4 star)
We knew very little about Awasi Patagonia before we left except for a small brochure describing different outings and activities and the information on their website. We also knew that we would have a private guide that would tailor the experience to our interests and needs. Shortly before the trip, we received a brief email questionnaire about diet, medical issues and our interests.
We were relying on the recommendation of OutsideGo and that it is a Relais & Chateaux facility.
We stayed for four nights and then returned to Punta Arenas to join our Antarctic 21 portion of the trip. This was an excellent recommendation from OutsideGo as it created a bit of a buffer in case there were travel delays getting to Chile that would interfere with the Antarctica portion of the trip.
Communications during the tour (5 stars)
A driver hired by Awasi Patagonia met us at our hotel, Hotel Cabo de Hornos, and drove us north along Route 9 from Punta Arenas to Puerto Natales. We were very comfortable with the driver, Gustavo, who stopped along the way so we could take some pictures. Sadly, he spoke very little English and our Spanish is extremely weak (Note to self: learn Spanish). In Puerto Natales, we were met by our Awasi guide, Eduardo, who drove us the last couple of hours to the Awasi Lodge. Eduardo was our guide for the remainder of our time at Awasi. Much of the second part of our ride was on unpaved rocky ‘roads’ in a modified Hilux DX (a vehicle designed to travel over very rough roads and through rocky rivers!) We suspect that this change in road quality was a major reason for the change in driver and it was a great opportunity for us to learn about Eduardo.

Gate on gravel road near entrance to Awasi Patagonia
(The black thing in lower right corner is an air vent for driving through rivers)
We had a warm welcome from the assistant manager, Catalina Bacells, and staff; and served refreshments while we checked in. Afterwards, Eduardo brought out a huge map and we discussed various activitiy options for the next three days. Eduardo was excellent and helped us formulate a good and doable plan that allowed us to experience much of what Torres del Paine National Park has to offer. He was able to teach us a tremendous amount about the different things we saw and he made sure we stopped at the most iconic sights in Torres del Paine.
As a side note, being in our 60s-70, we are not expert hikers, but love to walk and see things. Torres del Paine has many wonderful and world-famous hiking trails that exceed our abilities, but Eduardo guided us to see the best of the best. Everything (what, when and where) were always perfectly clear throughout our stay.
What was seen or experienced (5 stars)
The experience begins on arrival. You sit in the main lodge sipping a glass of delicious wine and nibbling on snacks while registration is completed. Your view of the Cordillera Paine rising above a valley, the absolute quiet except for the blowing of the wind, begins to make you understand the powerful enormity of the place.

View from Awasi Patagonia main lounge
Snacks and wine are always available
There are 14 villas with considerable distance between them. The villas are very comfortable with gorgeous panoramic views. There is nothing better than waking to dawn appearing just outside your room bringing the landscape to life, cattle and rabbits foraging for food.

Sunrise as seen from our Villa
(Other villas can be seen on far left and right--lots of distance between them)
Refreshed from a good night’s sleep, we had a relatively short uphill walk to the main lodge, nothing better to start a day then a bit of cool fresh air and a walk.
Every day, Eduardo took us to a different part of Torres del Paine. Our first day, we drove past a small group of Guanacos backdropped by the Torres del

Guanacos backdropped by Torres del Paine as we are leaving Awasi Patagonia
Paine through a small river into Zone C to see Laguna Amarga, Cascade Paine, a gorgeous waterfall and Laguna Azul.

Laguna Amarga in Zone C in Torres del Paine National Park

Cascade Paine in Zone C in Torres del Paine National Park
This trip provided several different wonderful views of Cleopatra’s Needles. At Laguna Amarga, the white shore is caused by living stromatolites. This is one of the few places in the world where this can be seen. The Rio Paine originates from Dickson Glacier terminal lake, Dickson Lake, so it is predominately a glacier river. This explains the magical milky blue green color. This is just one of the many glaciers of the world’s third largest icefield, Southern Patagonian Ice Field. In our travels, we saw Guanacos, a Southern Crested Caracara and a Buff-Neck Ibis. Click here if you just want to see all Zone C pictures.
On our second day we drove to the end of Route 9 along the Rio Baguales to hike a bit further to a marine fossil field in La Cumbre-Baguales Geological and Paleontological Park, known as Estancia 25 de Mayo that contains numerous remains of marine fauna. These fossils belong to the Miocene Age in which the Atlantic Ocean came to the Sierra Baquales as the Patagoniano Sea about 18-23 million years ago. The fossils were plentiful and easy to find as were Guanacos skeletons, a reminder of Puma activity in the area.

Fossils from La Cumbre-Baguales Geological and Paleontological Park
Sadly we did not see a Puma, but the Baguales with their dark, sharp peaks rising out of the gold-brown valley create a forboding feeling.

Sierra Baguales with an estancia
We passed through several estancia and saw several gaucho homes and considerable cattle and horses along the way. On our return to Awasi, we gave a ride to a gaucho’s wife, her son and cousin to Estancia Cerro Guido where they caught a bus to Puerto Natales on their way home. Gaucho’s live a very solitary life so it was unusual we actually met one’s family.

Sierra Baguales gaucho and his home
If you want to see all of the pictures from Sierra Baguales, click here.
On our third day, we awoke to a beautiful sunrise. After breakfast we traveled west and a bit south through Zones B and A to Grey Glacier This took us to the other side of Cordillera Paine along the north shore of Samiento Lago. We stopped to enjoy many wonderful sites: Almirante Nieto Mountain looking over Los Cisner Lagoon, the west portion of Samiento Lago

Almirante Nieto Mountain of the Cordillera Mountain Range of Torres del Paine National Park
and the two Horns overlooking Nordernskjöld Lake. It was fascinating to view the bicolor nature of the two Horns. This unique pattern was caused by a Miocene-aged laccolith (5-23 million years ago) lifting cretaceous sedimentary rocks (black-dark-formed 65-145 million years ago) and underlying granite (light grey) with subsequent glacial erosion of the sedimentary rock leaving behind the underlying more resistant granite.

Los Cuernos, the two horns, of Torres del Paine
The landscape is littered with skeletons of trees, the result of several fires started by park visitors.
Between two large glacier lakes, Nordernskjöld Lake and Pehoe Lake, is the Salto Grande Water Fall. This is a spectacular view, but perhaps the most

Salto Grande Water Falls
surprising aspect was the very high wind that made walking to the falls an adventure. There is a hand written warning visitors: “Wind gusts 80-90 km/h Be Really careful!” That is between 50-55 mph wind gusts. This is true, enough so that I decided that I could not use a tripod safely! There was a beautiful rainbow formed by the mist of the falls. A wonderful site to see. We then drove south along the Rio Paine stopping to take a picture of Pehoe Hosteria on Pehoe Lake. We crossed over the beautiful blue Rio Paine nestled

Rio Paine near Lake Togo Lookout
between golden brown hills and looked back toward the Horns and Paine Grande Hill on our way to Lago Grey, the terminal lake of Grey Glacier. Eduardo went to the main lodge to pick up our tickets for the catamaran while we took in the view of Lago Grey. We crossed the Rio Grey on a suspension type bridge (limit 6 people at a time) vigorously swaying in the wind and proceeded along a tree lined path that ended in a wide expanse of rounded pebble gravel formed by the water of melting Grey Glacier to the landing of the catamaran. The high, gusty winds enhanced the sense of barren desolation of the landscape.
Once on board the catamaran and sailing on Lago Grey, we had to stay inside due to the high winds and rough waters. As we approached the glacier, the winds settled but got colder. We were then allowed to stand on the upper deck, while we picked up a group of hikers from a very small rocky beach.

One terminus of Grey Glacier
The water was milky green-white, typical of glacier lakes. Grey Glacier is 3.7 miles wide, and divides into three termini, all three of which we visited. The glowing blue between the rugged ‘crystalline-like’ spikes of ice on the glacier

Another terminus of Grey Glacier highlight the blue colors
front is an image we will remember forever. The blue color was far more visible than in the Tasman Glacier in New Zealand, although that glacier also had some lovely blues. We returned to the main lodge via a bumpy, wet zodiac ride with wind howling around us.
We returned to Awasi for another lovely dinner and prepared for our departure to Punta Arenas to join our Antarctica 21 tour.
If you want to see all of the pictures from Zones A and B, click here.
Food: (5 stars)
Breakfast was pretty standard buffet, but you could also order off a menu as well. Dinners were spectacular. Below is an example of the menu and a few pictures of the food. While not huge servings, the quality and diversity are

Example of Awasi Patagonia Menu

Eggplant dumplings, tomato, olives and zucchini

Silverside fish boquerón, rhubarb confit, pickled radish and celery

Main Course and lots of fantastic wine and beautiful views
excellent. In our travels, there are only three other places in the world that are better than Awasi Patagonia: The Test Kitchen in Cape Town; Camp Jabulani Restaurant, South Africa; and Astrid & Gaston in Lima, Peru.
To read about our Antarctica adventure, click here.
OutsideGo-Awasi Patagonia-Antarctica 21
This is our blog about our recent trip to Awasi Patagonia, Chile and Western Peninsula of Antarctica through Antarctica 21. The trip was arranged through OutsideGo who put the whole thing together for us. This is the third time we have used OutsideGo (previously Unchartered Outposts) to arrange a trip for us. We keep using OutsideGo for many reasons, but the main reason is we have absolute confidence that our experience will be world class in terms of accommodations, food and things seen and experienced. We generally find reviews “It was absolutely perfect or horrible” to be worthless, so we have developed a more thoughtful approach to review our experiences to include thoughts on the following categories as they apply to different aspects of the trip:
1. Generation Considerations
2. Pre-tour communications and arrangements
3. What was seen or experienced
4. Communications during the tour
5. Accommodations
6. Food
7. Other stuff like clothing and camera gear
As mentioned above, this is the third time we have used OutsideGo (previously Unchartered Outposts) to arrange our travels, primarily because they arrange a world class trip with fantastic accommodations, great food and present a great collection of experiences. One of our trips was to South Africa and the other to Peru. Equally important is the pre-tour and during tour experience that has always been excellent.
Pre-tour communication and arrangements: (5 stars)
Laura Gerwin at OutsideGo did a tremendous job offering different trip options and costs in the initial phases of the process. To help understand, the original menu included three locations: Patagonia, Acatama and Antarctica with two options each for a total of six choices in various combinations. We chose Awasi Patagonia and the Ocean Nova with Antarctica 21. Once the trip design was settled based mostly on duration of the trip and cost, the more detailed planning began. Laura must have answered 100-200 emails concerning issues from camera gear, insurance, clothing and everything else. She was prompt and clear in her answers. She supplied several ways to view our itinerary that could be shared with family and friends. She arranged travel insurance through Berkshire Hathaway and helped with our air travel though AirTrek. All we had to do was pack.
What was seen and experienced: (5 stars)
As has been our experience with OutsideGo in the past, they really know how to arrange for an extraordinary trip. We will go into more detail below for Awasi Patagonia and Antarctica 21 separately, as the experiences were vastly different. Once you see the details, we believe you can understand the 5-star rating.
At OutsideGo’s recommendation we used AirTrek to arrange for our flights to and from Chile. They used American for our Chicago-Miami connections and Latam for our Miami-Punta Arenas flights. AirTrek’s service was excellent in arranging our flights, getting us assigned seats nearly 10 months prior to our departure and affordable tickets. They provided us with email updates as flight schedules changed.
As travel goes, it is not uncommon for problems to arise. Our first problem was our Miami to Santiago flight; delayed for ‘mechanical issues’ for 4 hours. We were able to reach out to AirTrek during the delay to investigate alternatives very quickly, although our best bet was to hope the delayed flight would eventually fly (AirTrek’s recommendation). It did leave 4 hours late, but as a result we missed our flight from Santiago to Punta Arenas. We reached out to AirTrek, OutsideGO and the in-country representative of OutsideGo, but they were not really able to help as they could not see/change our tickets as our ticketswere under control of the airlines. After a 2-hour high anxiety period, we finally got to the rebooking counter in Santiago where they told we were already booked on the 4:30 PM flight by ‘someone in Miami’. Knowing this tidbit of information would have saved us a lot of stress. We are not sure where the failure in communication occurred, but our educated guess is Latam.
On our return, our flight from Miami to Chicago was cancelled by American. Complicating factors was our connection time was only 2 ½ hours for arriving internationally. American rebooked our flight again with a short connection, but downgraded our seating; and I had pulled my hamstring (freak accident) in Antarctica that restricted my mobility considerably. Trying to make adjustments to what was happening was complicated by the fact that our American Miami-Chicago segment was booked through Latam. AirTrek is trying to get us a refund for the downgraded seats, but thus far Latam is giving them the run around. And Laura from OutsideGo arranged for a wheel chair in Miami and Chicago that was a life-saver.
Conclusions:
1. AirTrek did an excellent job arranging our flights with the possible exception of the short connection on our return through Miami customs. We should have also noticed the short connection before finalization. They did everything they could during the delayed and cancelled flights to assist us, but once the airlines assume control of your ticket, it is difficult to get travel arrangements adjusted by anyone but the airlines.
2. The concept of partnered airlines seems nice, but the sure fact there is not complete transparency between the partners creates opportunities to cause travelers problems. In future travels, we will be looking for single carrier, no partner solutions whenever possible.
3. We enjoyed our flights on Latam. The cabin was clean and well maintained (Miami to Santiago was better than Santiago to Miami, the food was quite good and the staff was pleasant. We flew first/business class with laydown seats. While expensive, you do not waste your first day or two recovering from your travels that is also an expensive waste of time.
Communications during the tour:
We were able to connect quickly with Laura at OutsideGo either by phone or Whatsapp as well as AirTrek at any time during the trip. The only real need was related to airline issues or connections between the different aspects of the trip as everything else was very smooth.
If one thinks about the trip, it can be divided into different segments or pieces with junctions between the segments. Everything was quite clear in the arrangements with a couple of exceptions: Connecting to our ride from Punta Arenas Hotel Cabo de Hornos to Awasi Patagonia, and our ride from Awasi Patagonia back to the Hotel Cabo de Hornos, as planned, would have made us late to our boot fitting for Antarctica 21. The Awasi group quickly made adjustments to get us back in time, once we told them when the boot fitting activity was scheduled. Antarctica 21 had signs at the hotel about the schedule when we arrived to go the Awasi Patagonia. I had taken a picture of those signs to help us remember the Antarctica 21 schedule.
Punta Arenas served as an intermediate location on our way to Awasi Patagonia and Antarctica. It is a small community of about 130,000 people on the Straits of Magellan. We stayed the Hotel Cabo de Hornos, a hotel in the center of town on the city square. This was an ideal location as there are many restaurants, coffee and gift shops and the Straits of Magellan in close proximity. Be warned that it can be very windy and a wind advisory was on one of the days we were there. It was difficult to even walk!

City sign on the Straits of Magellan (5 minute walk from our hotel)
We had dinner at dinner at two places: Sotito’s and Damiana Elena. We also enjoy breakfast at Wake Up and lunch at Tapiz Cafe. Damiana Elena, Wake Up and Tapiz Cafe were all 5 star places: great food, service and atmosphere.
I have created a separate subsection for our Awasi Patagonia experience. Click here to go to the Awasi Patagonia subsection. Click here if you only want to see our pictures from Awasi.

View of Torres Del Paine at Awasi Lodge on our arrival
I have created a separate subsection for our Antarctic 21 experience. Click here to go to the Antarctica 21 subsection. Click here if you only want to see our Antarctica pictures.

Iceberg against mountain background in Gerlache Strait, Antarctica
Photography Gear
This was a trip of a lifetime and we wanted to make sure we captured as much of it as possible.
Photography Related Gear:
1. Two
Sony a7RII
2. Sony
16-35mm, Sony 24-105, and Sony 70-200mm all f4 lenses
3. Sony
RX100M6
4. GoPro
Hero 5 Black
5. 12
cards- Sandisk 64 GB 300MB/sec
6. Pelican
12 card case
7. Lots
of batteries (cold weather really kills battery life) 5 NP-BX1 for Sony RX100M6
and 8 NP-FW50 or equivalent (RavPower RP-PB056 Savior Series) for the a7RII.
8. Battery
chargers: GoPro charger (Mibote-GP-BCG-503), Sony RX100M6 (Newmowa
CHG-NPBX1-NMW, Sony a7RII (RAVPower RP-PC056 Savior Series). All of these chargers were micro USB based
and would charge 2-3 batteries at a time.
9. A
6 and 10 stop neutral density filter, and a 72 to 77 step up ring from Breakthrough
Photography.
10. Two SDXC USB 3.1 USB C card readers
from Cable Matters (Model 201058)
11. USB C to B adapter from Aukey
12. iPhone shutter release from Camkix.com
13. Vello ShutterBoss II RC-S2II from www.vellogear.com
14. VisibleDust Zeeion blower for
sensor cleaning from www.visibledust.com
15. Western Digital 2 TB My Passport
SSD (USB C)
16. Various cables
17. A BUBM case to carry items 4-16
above from www.bubmcase.com
18. 15 inch 2018 MacBook Pro with 2 TB
internal SSD drive
19. GoPro Triple Selfie stick
20. Water proof bags from REI
21. Ceptic Ultra Compact Dual USB Power Plug-for European Type C
22. MindShift UltraLight 36L Dual
Backpack
Workflow: At the end of each day, the images from the day were transferred from the SDXC cards to the MacBook Pro internal drive. They were index by a 10 digit number YYMMDDxxxx, where YY is the two digit year, MM is the two digit month and DD is the two digit day and xxxx is a sequential number from 1 to 9999, as they were imported into LR CC. Following import, the MacBook Pro was backed up to the WD 2 TB My Passport SSD using Carbon Copy Cloner and if the SDXC cards were full or nearly so, they were locked and stored in the Pelican case. With this approach I had three copies of each picture at the end of the day.
Metrics for cameras:
Approximately 6770 digital assets were taken during the trip. 794 (12%) were video and the remainder were still pictures. Of the still pictures, 33% were taken with the Sony RX100M6, 75% were taken with the Sony a7RII and 2% taken with an iPhone X. The full set of images were reviewed and rated using criteria, such as story telling, image quality and interest, without knowledge of camera source.
Only 709 (~12%) remained after the rating process and were considered ‘good’. 67% of the good pictures came from the a7RII body, 31% came from the RX100M6 and 2% from the iPhone X; however, when examined relative to how many pictures were taken by each camera type, 15% of the RX100M6 pictures, 11% of the a7RII pictures and 12.4% of the iPhone survived.
Based on this type of analysis the RX100M6 did a great job at creating high quality images, although some of the a7RII discount was related to high frame shooting (looking for 1 in 10-30 shots) or HDR shooting.
For the a7RII bodies, I left the 16-35mm f4 lens on one body the whole time. In Chile, the second body had the 24-105mm f4 lens and I elected to have the RX100M6 provide for the up to 200mm range. In Antarctica, I put the 70-200 lens f4 lens on the second body. For the a7RII bodies, the ‘keeper’ pictures were equally distributed across the three lens.
The large majority of the video clips came from the RX100M6 and GoPro cameras.
Clothing:
Think layers. The weather in Chile is warmer than Antarctica so we had to have clothing for a wide range of conditions. Antarctica 21, through their website, encouraged the use of Musto products for that part of the trip, but we chose Columbia for our mid and outer gear mostly because of cost considerations. We were extremely happy with our choices and would add the inner fleece glove was an excellent solution for taking pictures and the walking sticks were critical.
1.
For
socks we had regular REI hiking socks for Chile and Smartwool socks for Antarctica. These were perfect.
2.
Base
layer: We used silk base layers (don’t remember the brand) both for the legs
and upper body
3.
Mid
layer: our regular clothes (pants and shirts)
4.
Mid
layer 2: Columbia fleece
5.
Mid
layer 3: A zip-in puffer liner interchange jacket with Omni heat
6.
Mid
layer 4 option: Arc’Teryx Jacket with hood and built in balaclava
7.
Outer
layer: Columbia waterproof ski pants
8.
Outer
Layer: Interchange (Columbia Men’s and woman’s Bugaboo Waterproof Interchange
Jacket with hood)
9.
Gloves:
Columbia waterproof ski gloves with Omni heat liner with an inner fleece glove
10. Hat: Columbia Titanium Omni Heat
Hat
11. Walking sticks from REI that
disassembled into three pieces with snow baskets
Miscellaneous comments:
1. Mindshift UltraLight 36L backpack: When traveling, I carried my two a7RII and all three lenses in the bottom compartment, two of which were attached. The top compartment carried all my medicines, the full BUBM case, small case with electrical outlet adaptors and USB charging cables, GoPro 3-way grip, glasses case and the Sony RX100M6. When out and about, I would empty the top compartment and put extra layers of clothes and other items or just take the lower compartment with the camera gear. This made the backpack very versatile. However, the rotation concept of the backpack to get a camera was awkward at best and really did not work very well. But the removable camera case in the bottom of the bag worked as a perfect solution. I have noticed a new 180° rotational backpack from MindShift and that concept seems like it would work better.
2. Our gloves had an inner fleece glove with an outer water proof glove. This was an ideal combination for taking pictures and staying warm, particularly on the Antarctica portion of the trip.
3. The BUBM case is a great little organizer of the many widgets.
4. The Breakthrough neutral density filters and step up ring are fantastic.
5. I had no widget failures (listed in camera gear) with the one exception when the camera card prematurely ‘ejected’ from the Cable Matters card reader once. Continued use of the specific card reader resulted in no additional failures.
6. Finally, if you really want a great adventure nearly anywhere in the world, contact OutsideGo. We are in our 60-70’s, but this would have been great, no even better, if we had been in our 30's. Stay at Awasi Patagonia if you want luxury while experiencing the splendor and adventure of Torres del Paine. And last, Antarctica 21 is a world class way to experience the rugged Antarctica.
Neutral Density Filters (Sony a7RII)- Singh-Ray and Breakthrough filters
In the fall of 2018, we took a trip along the Blue Ridge Parkway in the hopes of capturing fall colors. Typically, waterfalls on the Parkway are less than impressive in the fall, but this year, the waterfalls were quite elegant, while the fall colors were disappointing. The impressive waterfalls begged for me to use my neutral density filters to give the wonderful creamy appearance.
Singh-Ray Variable Neutral Density Filter
I had a Singh-Ray 77mm (Thin Mount) Vari-ND Variable Neutral Density filter with me. Fortunately, I had done some previous evaluation of the performance of this filter on my Sony a7RII with a 24-105 f4 lens, but I had failed to remember that my 16-35 f4 lens was only 72mm. With a little bit of work, I was able to get some nice waterfall images.

Upper Lindeville Falls: 0.5 sec, f13, ISO 50 (Singh-Ray filter)

Rake Mill Pond: 1.6 sec, f11, ISO 50 (Singh-Ray filter
While these were satisfactory, in the top picture I had to push the f-stop up to f13 to slow the shutter speed to 0.5 seconds (sort of at the very low end for shooting waterfalls for the creamy look).
In previous evaluations of this variable density filter, I knew a couple of very important things. First, a bit of an explanation about the Singh-Ray filter. The density of the filter (according to published specifications) is from 2.4 to 8 stops. This variable density is accomplished by rotating the front right (below) from min to max. I am assuming that the first line on the left represents about a 25% adjustment, the midline about a 50% adjustment and the right line about a 75% adjustment.

1. At a focal length of 24mm, there was some significant blue cast vignetting apparent on the Sony 24-105mm f4 lens at 24mm which improves at 28-30mm.

1/160, f7.1 ISO 200 at 24mm
2. At a focal length of 16mm (72-77 step up plus Singh Ray Vari-ND), the vignetting issue gets much worse (see below) on a Sony 16-35mm f4
3. At a density setting of 75%, a purple hue effects the image (see below and compare to the one above)

4. At near maxium density setting, a horrible X shaped color cast forms (see below)

Singh-Ray Conclusions
1. The full range of 2.4 to 8 stops is not useable as color casting becomes a significant problem above the 75% mark. I am guessing this is about 6 stops
2. Vignetting on the Sony 24-105 is evident at 24mm and disappears at 28-30mm. On the Sony 16-25mm f4 (with 72-77 step up ring), vignetting is a severe problem at 16 mm and improves(nearly gone) at 20mm
Breakthrough X4 Neutral Density filters
Because of the Singh-Ray limitations, I decided to evaluate Breakthrough X4 neutral density filters. I tested the 6 stop and the 10 stop filters on both the Sony 16-35 f4 (with a 72-77 step up ring) and the Sony 24-105 f4.
Vignetting: Neither the 6 stop for 10 stop filters caused any vignetting on the 24-105mm f4 lens. On the Sony 16-35mm f4, the 72-77 step ring did not cause vignetting (see below)

Adding the 6 stop filter caused a very small amount of vignetting that was easily corrected in software (see below)

Sony 16-35mm f4 with 72-77 step up ring and Breakthrough 6 stop X4 ND @ 16mm
Stacking the 72-77 step up, 6 stop and 10 stop neutral density filters did cause considerable vignetting at 16mm (see below), but the vignetting disappeared at 18mm (second picture below)

Sony 16-35mm f4 @ 16mm (72-77 step up ring,6 stop and 10 stop X4 ND stacked

Sony 16-35mm f4 @ 18mm (72-77 step up ring,6 stop and 10 stop X4 ND stacked)
No Color Cast with Breakthrough X4 ND filters
I did a very simple test of color cast with the Breakthrough filters. I took three images with no filter, with the 6 stop filter and then the 10 stop filter using the Sony 24-105mm f4 lens. The images are below and they are without any correction. It appears that there is no to very minimal color cast with either of these two filters.
No filter

6 stop Breakthrough X4 ND Filter

10 stop Breakthrough X4 ND Filter
From each of the images above, I pixeled peeped to evaluation sharpness. At a 2:1 magnification, I saw no evidence of loss of sharpness (see below)

Breakthrough X4 Neutral Density filters conclusions
1. On either the Sony 16-35mm f4 or 24-105mm f4 there is excellent vignetting control
2. There appears to be no to minimal effect on sharpness of the image.
3. There is no obvious color cast with either the 6 or 10 stop filters.
UltraLight Dual 36L Mindshift Bag
I recently purchased this bag for some very specific needs. This discussion assumes you have viewed the details of the product offered on other sites.
- I wanted to carry my camera equipment in a backpack but access it without putting the bag down on the ground.
- I wanted enough room so I could store extra clothing, such as a fleece or rain parka.
In the past during travel, I would carry three and 1/2 bags
- An Airport Essentials from Think Tank: two Sony a7RII attached to lens, Sony 16-35mm f4, Sony 24-105 f4, Sony 70-200mm f4, GoPro Hero 5 Black, computer, backup drives, 8-12 SD cards, filters, batteries and chargers, lens cleaning equipment and an Artic Butterfly blower.
- A Seattle Sports duffle bag with clothes, tripod, personal hygiene stuff, walking sticks, duplicate chargers and sensor cleaning equipment.
- And an empty 28 Osprey backpack packed in the duffle bag.
- The 1/2 bag was my wife’s carry on which included chargers for iPhones, iPads, outlet adaptors, my iPad and medicines.
Whenever we arrived at our destination and were out and about, I would transfer two camera bodies with desired lenses attached, the GoPro and stick (if they were going to be used), and a couple of extra cards and batteries to the Osprey backpack. Whenever I wanted to use a camera, I just put the Osprey down and got the desired camera. While this strategy worked, it had some serious draw backs
- There is very little room for anything extra in the Osprey bag.
- Always had to lay the Osprey bag down to access the desired camera body and lens.
- My wife was carrying a fair amount of my extra wait.
My primary purpose of this bag was to use it on a trip to Chile and Antartica. Over the past week, I have tested the bag on a driving trip on the Blue Ridge Parkway.
- I was able to pack all of my camera gear and ancillary stuff into the bag! This allows me to get rid of 1 1/2 bags. This included the following items:
- In the lower chamber I had a Sony a7RII attached to a Sony 16-35mm f4, a Sony aRII attached to a Sony 24-105mm f4 lens, and an unattached Sony 70-200mm f4 lens. It seems any combination of this equipment attached and unattached lenses will work!
- In the back slot, I had a 15” 2018 Apple MacBook Pro in a protective sleeve. You can also use this as a water bottle pouch.
- In the top chamber, I had the following items stored in separate protective containers. Container 1: a 12 SD Pelican 0915 Memory Card Case, WD 2TB My Passport SSD Portable Storage-USB 3.1, 8 batteries for the a7RII cameras, 4 batteries for a Sony RX100 M6, 4 GoPro Hero Black batteries, two Cable Matters Dual Slot USB C card reader and various cables. Container 2: 3 Apple USB charging blocks, 3 cables, and a fitbit charging cable. Container 3: All my medicines and critical personal stuff. Container 4: Watson Duo LCD Charger with 2 NP-FW50 battery plates two NP-BPX plates plus power cord, GoPro Hero Black, and a xxx battery charger with cables, a GoPro 3-Way Grip stick, two remote releases (a Sony RMT-DSLR2 and CamKix Wireless Bluetooth Camera Shutter Remote Control for Smartphones), a Singh-Ray 77mm (thin mount) Vari-ND Variable neutral density filter, a VisibleDust Zeeion rocket blower, and two REI dry bag (5 and 10 liter).
- The weight of the fully loaded bag was about 25-26 pounds.
- My tripod and walking sticks were packed in the checked luggage
- Upon arrival at our destination, I would simply remove the computer, all the contents in the upper chamber, and configure my two camera bodies with the lens that I wanted for that particular destination. I could have carried all three lenses, but I very very rarely change lenses outside. I was able to generate three different configurations depending on my needs.
- I could leave the cameras in the lower pouch and rotate the camera bag as described in the MindShift videos. In this configuration I found access to the cameras to be awkward when I had two camera bodies with lenses attached. If you are rarely accessing the cameras and not changing cameras frequently, this is workable, but care must be given that the other camera body does not fall out. If you only have a single camera body with lens attached this will work just fine.
- I could remove the bottom pouch with the cameras and use it as a shoulder bag. This is a very workable solution in terms of camera access, but you lose the storage capacity in the top of the bag.
- I could remove the bottom pouch with cameras, and attach it to the belt and shoulder straps with the tripod suspension kit. MindShift refers to this configuration as Front Mount. I found this configuration to be very workable with ready access to the cameras and lots of storage for clothes in the back top pouch. The only issue that I noticed was when walking up steps or hills, the camera bag would hit my thighs, although I think I could have raised it considerably to at least partially avoid this problem.
- In all of these options, I can have dry bags in the various lower pouch compartments to selectively protect the camera gear from rain.
General Impressions
- The lower compartment of the bag readily holds two Sony a7RII bodies with attached lenses plus one additional unattached lens. Lenses I used were the Sony 16-35mm f4, 24-105mm f4 and 70-200mm f4.
- In combination with the upper compartment, a lot of camera equipment can be transported in the bag.
- While some reviews commented on the difficulty of removing the lower compartment shoulder bag, after a few times, I found that it was not all that difficult.
- While the rotation concept is a great idea, I found it a bit awkward and leaves room for improvement, particularly when two bodies are used
- The ability to remove the lower compartment with cameras and lenses attached as a separate shoulder bag is great. This will likely be my prefered configuration: a separate shoulder bag or the Front mount the Mindshift describes.
Sony RX100 V6
When we travel, my wife will regularly want to take some pictures. On our last trip I packed a Sony 7R with an attached 24-200mm f3.5-6.3 lens for her use. She never touched it, but instead would grab a GoPro Hero5 Black for both stills and video clips. While this ‘works’ the quality of the images are just ok. After doing some internet research, I decided to rent the Sony RX100 V6 from LensRentals for 3 weeks and test drive the camera and also to see how my wife would or would not use it. I had two reasons for making this selection: the 24-200mm zoom and the small size
To provide some perspective, I shoot Sony a7RII with several of their zoom lens (16-35, 24-105 and 70-200mm all f4) and a couple of their prime lenses (28mm f2.0, 55mm f1.4 and 85mm f1.4). Given this experience, I found the menu and controls of the RX100 V6 fairly familiar and easy to work with.
This is not a review of the capabilities of the camera as those can be found elsewhere, but I will assure you that this is a very powerful camera lots of functionality built in.
There were two things I wanted to know at the end of the test drive: image quality and usability (would my wife use it).
With respect to usability, my wife did not hesitate to use the camera, although it had been configured in shutter priority, center focus, and auto ISO so minimal knowledge was need to operate the camera. At one point, I changed the focus to spot focus and she adapted very quickly to the touch focus capability. Perhaps the most remarkable observation, is I would also use the camera and could readily access many of the more powerful features. The electronic view finder was ok and ‘worked’ in a pinch when the back LCD could not be seen. The built in flash also worked well within the expectations given it’s small size.
The only negative on usability is one must be very careful not to touch the lens accidentally (leaving smudges). The only other negative for the camera is the video formats do not support MP4 and the time stamps for the AVCHD or XAVC files do not correspond to the actual time the video was taken, but rather GMT time.
With respect to image quality, it was quite impressive. I have provided a few examples below. All pictures were processed through Lightroom CC using my standard work flow. You can get full size version of the picture by clicking on it.

Taken as a JPEG from an airplane at 1/640 sec, f4.5, ISO 125 at 45mm equivalent.

Taken as a JPEG at 1/60 sec, f4, ISO 640 at 46mm equivalent.

Taken as a JPEG at 1/250 sec, f8, ISO 125 at 72mm equivalent.

Taken as a RAW at 1/1000 sec, f4.5, ISO 320 at 195mm equivalent.

Taken as a RAW at 1/1000 sec, f4.5, ISO 250 at 195mm equivalent.

Taken as a RAW at 1/50 sec, f2.8, ISO 6400 at 24mm equivalent.

Taken as a RAW at 1/320 sec, f4.5, ISO 1600 at 195mm equivalent.

Taken as a RAW at 1/160 sec, f2.8, ISO 6400 at 24mm equivalent.
There two very cool features in this camera. The first is the very high frame rate that you can achieve: 24 frames per second as stills for about 230 images! The second feature is the ability to transfer JPEG files to your mobile device. Other Sony cameras have this feature, but we really used it with camera because it allows for rapid uploading to social media. The implementation is a bit cumbersome, but it does work reasonably well.
The bottom line is the Sony RX100 V6 is a very useable camera that generates high quality images in a compact, point and shoot format.
New Zealand with MoaTrek Tours
I generally find reviews that say “It was absolutely perfect or horrible” to be worthless so I decided to write a bit more detail about our New Zealand experience with MoaTrek. If you don’t want to read the whole thing our conclusions and picture link are in the first two paragraphs. We found New Zealand full of beautiful and diverse scenery; and friendly and welcoming people. Moatrek did a really great job introducing us to New Zealand. Below are details as to why we make these comments.
If you just want to see some of our pictures, you can go here.
When we started writing this review, we wondered about the best approach to the review. What was important to consider? The following major categories were considered
1. General considerations-5 stars
2. Pre-tour communication and arrangements-5 stars
3. What was seen or experienced-5 stars-would give it a 6+ if that were on the scale.
4. Communications during the tour-5 stars
5. Accommodations 4+ stars
6. Food-4 stars
General Considerations:
First it is important to provide the perspective that we came to the tour with. Our only tour experiences (one to South Africa and a second to Peru) were private tours. The Moatrek tour was a small group rather than private. The people on the tour were friendly and enriched the experience vs that of a private tour, but the trade-off was that the schedule needed to be adhered too more rigorously.
When we started looking at Moatrek as a tour service, there was a detail that we did not fully appreciate: they provided information on various optional activities that would add an additional cost. Originally, we had not planned on doing these optional activities, but in the end we chose to do several of them. Without a doubt these optional activities greatly enhanced our overall experience and Moatrek did an excellent job integrating these optional activities into the tour. The optional activities we chose: Tiritiri Matango Island, Rotorua Canopy Tour Zipline, Te Pō, Zealandia, Abel Tasman hike from Awaroa to Tonga Quarry, Tasman Glacier Explorer Tour, and the Dart River Jetboat Wilderness Safari. I will offer more comment on these optional activities later.
Pre-tour communications and arrangements:
We found these communications were excellent and all of our questions were promptly answered. About 4 weeks before the tour, we received a detail itinerary that included all of the tour activities, our selected optional activities, accommodations (and contact info) and restaurant recommendations. Moatrek recommends having a copy with you. We agree and had a copy on our mobile phones as well as tablets.
What was seen and experienced (we saw a lot so this will be a bit long):
We took the 14 day Kiwi tour that included Auckland, Rotorua, Tongariro National Park, Napier, Wellington, Nelson, Methven, Mount Cook, and Queenstown. And we traveled in a small van that could seat a maximum of 20 people. We had 10 on the tour with us and that was a perfect number. 20 people was doable but it would have been pretty tight.
We saw a lot of New Zealand in a very short time. Nearly all was very interesting and there was very little wasted time. The down side of this whirlwind tour was we found on many occasions a desire to linger and absorb the details, but were unable to do so. There were many occasions we wish we could have stopped along the road to take pictures of beautiful countryside or stay longer to experience the bubbling mudpots or sit in the Lake Rotoiti Hot Springs longer. Given the natural tension between wanting to see a lot and desire to linger, in our opinion, the MoaTrek Tours achieved a very respectable balance.
Our guide, Andre Booth, was very knowledgable and provided two very important functions: provided interesting history and details of New Zealand as we traveled to the different places and kept us informed to the day’s activities and options. He also made sure everyone was doing ok. He was great!
Some of things we did:
Sebel Hotel in Auckland: This hotel is located on the harbor. The provided link does not really do justice to how great this hotel is. It is within a few steps of a wonderfully entertaining and vibrant harbor area, with many great places to eat, places to relax and people watch. Very enjoyable.
Viaduct Lookout near The Sebel in Auckland

Wedding Guest in the Viaduct Lookout
Tiritiri Matango Island: This was a wonderful walk. If it is your first visit to the island, we would strongly advise having a guide. Don’t expect to get super great pictures of birds/wildlife unless you are willing to spend a fair amount of time on the island. It is plentiful, but as to be expected, carefully hidden in the trees and ground.

Hobbs Beach on Tiri Tiri Mantangi Island

The rare Stitchbird near a honey feeder
Karangahake Gorge: a hike through an old mining area with very pretty views. This is one of the places where some extra time would have been appreciated.

Suspenion Bridge over the Waitawheta River
KiwiFruit Country: This was a fascinating experience and Gavin Fleming, the owner, was very informative. We learned a lot about kiwi farming, its history and tasted some very fresh kiwi.

Golden Kiwi on the vine
Tiua Catamaran (Pure Cruise) ride on Lake Rotoiti: This is a relaxing experience, but for us marred by heavily over cast skies (lots of the beauty was lost) and a break down in communication to remind us to take our swim suits with us as we sailed to the Lake Rotoiti Hot Springs for a dip. Fortunately I was able to borrow a suit, but my wife was not able to. This was a significant disappointment so don’t forget your swimsuit at Pure Cruise.

Manupirua Springs Hot Pools

Soaking in the hot springs
Rotorua Canopy Tour Zipline: This was an unbelievably positive and wonderful experience. It is an adrenaline rush combined with the beauty of flying over the tops of very old trees. Our two guides, Pinkie (Liv) (age 23) and Tom (age 19), were excellent and made us feel very comfortable doing something that seems inherently very dangerous. One of us was really scared, but made it through with flying colors!!

Getting fitted with lots of gear and safety devices with Pinkie

Flying

On one of the stands between 5 separate zipline paths
Lake Tarawera: We had a sack lunch and a boat tour on the lake. The history is fascinating and well told by Totally Tarawera. Our trip was marred by heavily over cast skies. Had we been traveling on our own, we might have stayed a day or two for better weather to experience the beauty of the lake.

Natural hotspring on Lake Tarawera
Waiotapu Geothermals: Fascinating geology and wonderful views. We were able to see mudpots as well as the famous Champagne pool. This is something you don’t want to miss, but also ponder what is brewing just below you. Lots of fun colors but dampened by overcast skies. This is one of those place where we might have lingered longer or stayed for nicer skies.

Mudpot of Waiotapu Geothermal area

Waiotapu Geothermal Champagne Pool
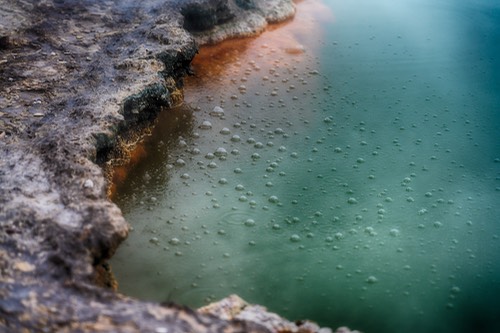
Waiotapu Geothermal Champagne Pool Bubbles!
Wairekei Geothermal Power Plant: We were able to get an elevated view of the plant and marvel at both its size and complexity. 80% of New Zealand electricity comes from renewable resources and 16% comes from geothermal plants, such as this plant.
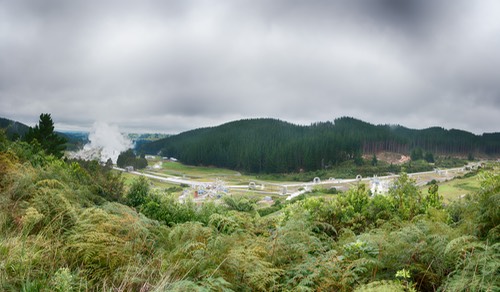
Wairekei Geothermal Power Plant
Taupo/Lake Taupo: There are beautiful pictures of this lake, but the weather was overcast. We did eat lunch in Taupo and walked around a bit. It seems like an interesting town. This is another example of where lingering a day or two might have been worth the view.
Tongariro National Park: An excellent walking/hiking area. We really liked the park and thought it was beautiful. Views of Mount Ruapehu can be stunning if the weather cooperates. This is another place where staying another day or so could have been fun, particularly if one likes to hike. Our weather was quite nice here. Hiked to Taranaki Falls. This is a modest hike except for the last bit that is a very steep set of steps down and then back up returning.

Chateau Tongariro Hotel

Mount Ruapehu (Mt Doom in the Hobbit) from the Chateau

Taranaki Falls
Waipunga Falls: We stopped by a lookout over the falls on our way to Napier. It is an impressive falls. Would have loved to see these falls from below, but not sure whether that is possible

Waipunga Falls
Napier:Art Deco Tour. We stayed at the Scenic Hotel Te Pania. We enjoyed the small city feel of Napier and there are lots of interesting buildings with Art Deco design elements. The hotel is very close to the ocean, lots of small shops, restaurants and a beautiful park, Marine Parade. We also enjoyed a lovely sunrise. We felt it was a worthwhile visit.


View of shoreline in Napier

Ocean viewing platform-part of Marine Parade Gardens

Sunrise as seen from our hotel in Napier
Enroute to Wellington: As I mentioned we traveled on a small tour bus which was quite comfortable. We could have flown between major cities, but would have lost so very much of the character of New Zealand. Below provides just a small glimpse into understanding the value of traveling by vehicle

This scene was between Napier and Dannevirke. It is a fascinating building and an example of wishing there was more time to stop to get some great pictures. This picture was actually shot from our moving bus using a very fast shutter speed (1/1000) and continous focus mode. Not the most optimal way of capturing a picture, but this image creates for us a wonderful memory of New Zealand country side. We took many pictures from the moving bus with similarly good results, just have to watch out for window reflections.

Cahoots Cafe in Greystown

Inside and menu of Cahoots Cafe

One tiny piece of Cahoots Cafe decor
We stopped in Greystown for lunch. It is a tiny town of about 2200 people, but it has lots to offer. For lunch there were many choices, but we selected Cahoots cafe. It was a great choice and other agree with us!
Wellington: We chose to walk along the harbor from the Museum of New Zealand Te Papa Tongarewa back to the Bolton Hotel. There were lots of fun things to experience: kids jumping off a plank into the harbor, reading love/memory padlocks firmly attached to a grid fence, people watching, sampling some ice cream, watching helicopters take off/land, and people kayaking and paddle boarding. We also took the Zealandia Eco-Sanctuary by night tour. It was a very pleasant walk and we got to see a single Kiwi, in addition to glow worms, and skinks. During the nighttime walk, red lights are used to illuminate things of interest. I took some pictures with very fast lenses, but the red light caused some issues. Overall, this is an interesting walk.

Boys enjoying a dip in Wellington Harbour

Love Locks at Wellington Harbour

Skink in Zealandia
Interislander Ferry from Wellington to Picton: We traveled in the Premium Plus Lounge where we had breakfast and very comfortable seats. This is a gorgeous trip, take a selfie or two and plan on watching the shoreline pass by. Remember the hat in selfie picture because there is more story later on that subject.

Interislander Ferry

Selfie as we approached the south island

View from the ferry as we pass through the channels to Picton
Forrest Estate Wines: We stopped here for a gourmet picnic lunch and sampled 3-4 of their wines. This was a delightful stop and both the food and wine were excellent. Well worth the visit. Could have sat there for a couple more hours just enjoying the scenery, wine and good company.

Jan setting up our picnic tables

Our tour group enjoying the wonderful lunch
Pelorus River: We stopped for a rest stop along the Pelorus River (famous in the filming of the Hobbit and Lord of the Rings). The river was tame and a wonderful green color. Would have loved to explored this river a bit more, particularly the famous Pelorus Bridge.

Just a short way down river from the Pelorus Bridge

Our tour group enjoying a rest break by the Pelorus River
Nelson: This is a great little town and seems like a jumping off point for adventures in the Tasman National Park. We stayed at the end of Trafalgar St. A short walk along Trafalgar St takes you to just below Nelson Cathedral and a wonderful fresco eating area. We had excellent dinner here at Bacco and enjoyed people watching.

Trafalgar St, Nelson, New Zealand

Nelson Cathedral (Christ Church Cathedral)
A common sight, people with various injuries. Lots of adventure

Bruschette from Bacco
Abel Tasman National Park: We traveled to Kaiteriteri via the Abel Tasman Sea Shuttle and boarded a ferry to make our way to Awaroa Lodge. Along the way to Awaroa Lodge, we saw Split Apple Rock, wonderful golden beaches, and a few seals. There are several different tours to choose from, but we disembarked at Awaroa Beach, walked past Awaroa Lodge (after enjoying a coffee and pastries) on to Onetahuti Beach along the Abel Tasman Trail. We arrived at high tide so there was only a narrow strip of beach to walk along and we had to walk through chest deep water to continue on the trail to Tongo Quarry. At low tide, there probably would not have been nearly as deep of water to walk through. A recent posting on the Abel Tasman website indicates that 4 hrs within the low tide time, the cross is dry. The undulating trail is beautiful and well worth the hike.

Abel Tasman Sea Shuttle boarding at Kaiteriteri

Split Apple Rock

Campers on golden sand beaches on the Abel Tasman Trail

First part of our Abel Tasman hike to Awaroa Lodge
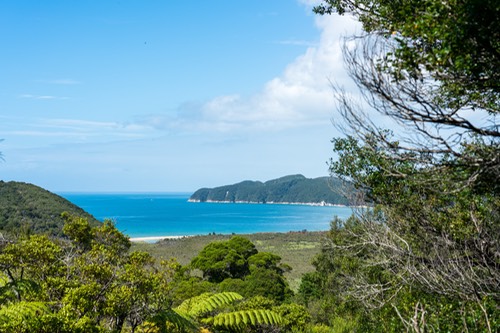
First view of Onetahuti Bay and Beach

Onetahuti Beach at high tide
On to Methven: We had a long travel day from Nelson to Methven. Along the way we stopped in the wonderful little town Murchison (pop about 500) and discovered Sweet Dreams French Bakery. They had the world’s most delicious Custard Chocolate Twist!! Sweet Dreams is rated 5 star on TripAdvisor and we would have to agree. Then we stopped at Maruia Falls (33 feet high, but it looked higher to me) and watched several kayakers go over the falls. Talk about an adrenaline rush. It is also very beautiful both above and below the falls. Then traveled on to Culverden (pop 426), shopped at the Three Bored Housewives (lots of interesting stuff) and had lunch at Red Post Café. Very tasty and they had a cool, very old red refrigerator. In Methven, while close to town (10-15 min walk) we decided to eat at our lodging, Ski Time Lodge and had a very good meal.

Country side between Nelson and Murchinson
Sweet Dreams French Bakery in Murchinson

Kayakers going over Maruia Falls. Talk about an adrenaline rush!

Country side between Maruia Falls and Culverden

Three Bored Housewives in Culverden

Akaunui Homestead Farm. We met Ian and Di MacKenzie who were delightful and welcoming. Ian showed us around the farm (dairy cattle and sheep, but most famous for carrot seeds), while Di prepared an unbelievably good lunch (more like a feast) with produce only from the farm. The history is very interesting and Ian and Di tell some wonderful stories. I think most people would have loved to stay longer. Sadly, it was raining so we did not get to enjoy the surrounding gardens that Di manages, but the link provides a very good idea about the gardens.

Ian MacKenzie

Di MacKenzie

Kitchen of the Akaunui Homestead
Lake Tekapo and Church of the Good Shepard: The weather was very overcast and raining. One can tell Lake Tekapo is a gorgeous blue-green lake, but we only got a glimpse of it in the weather. The church had lots of tourist, like us, and while great to see up close, it would have been fun to see from a different vantage point than the parking lot. This is another place where more time, in good weather, would have been very nice.

Lake Tekapo

Church of the Good Shepard
Aoraki Mount Cook Alpine Village: When we arrived, it was heavily overcast which was a major disappointment. BUT, we had a wonderful dinner in the Panorama room at The Hermitage and rose early to find wonderful stars from our room balcony and then a spectacular view of Mount Cook (Aoraki). Delighted to see the mountain and its surroundings.
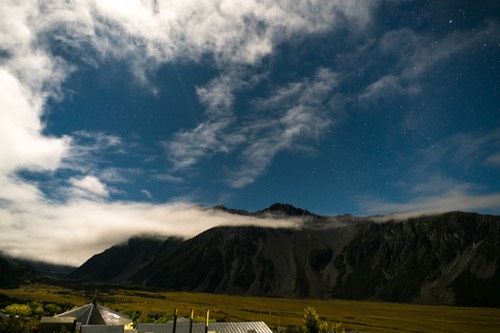
Early morning stars from our room at Aoraki Mount Cook Alpine Village

Early morning view from our room at Aoraki Mount Cook Alpine Village

Mount Cook (Aoraki)
Tasman Glacier Explorer Tour: We think this is one of the must do activities and it is very much worth learning about the history of the glacier and the lake. We had a pleasant short walk from a car park to Lake Tasman with beautiful views where we boarded a small MAC boat that got us up close and personal with icebergs from the glacier as well as close to the face of the retreating glacier. The views and experience on the lake have created lasting memories and our guide was excellent. The blues in the ice can only be appreciated in person, but did the best I could. This is another place where more time would have been deeply appreciated.
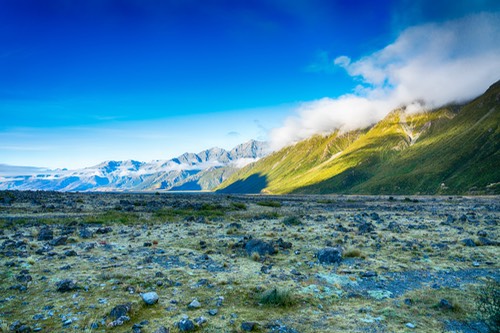
View from our short walk to Lake Tasman.

Our group walking down to the Mac Boat on Lake Tasman

An iceberg on Lake Tasman

An iceberg on Lake Tasman)

Full face of Tasman Glacier
High Country Salmon: Near Twizel. We got some sashimi and smoked salmon and ate in Omarama. It was delicious. In Omarama we also found Kebabs at The Love Shack, a roadside food stand.
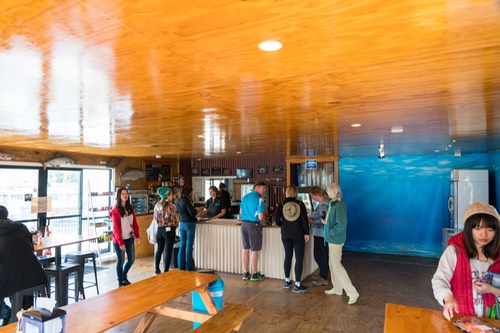
High Country Salmon near Twizel
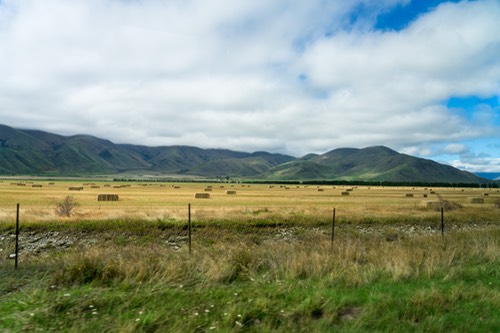
Country side view between Twizel and Omarama
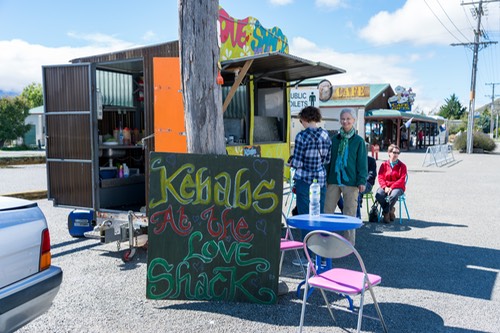
Mrs. Jones Fruit Orchard, Cromwell: A large fruit market with lots of variety. The fruit was very fresh and tasty. We bought some pears and apples for snacks to eat in Queenstown.

A small view of Mrs. Jones Fruit Orchard fruit market
Skyline Gondola ride to Bob’s Peak: At the top is a spectacular view of Queenstown. If you like high overlook views of cities, this view should not be missed. Keep your eyes open for bungee jumpers on the way to the top. Would have liked to spend a bit more time looking at the view and the paragliders catching the air lifts.

Boarding area for going up to Bob’s Peak
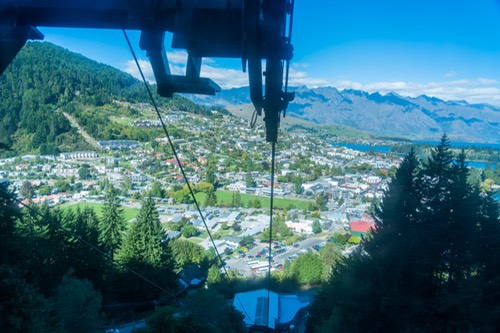
View from the gondola part way up to mountain

Panoramic view of Queenstown and part of Lake Wakatipu

Selfie on Bob’s Peak with Queenstown in background
Milford Sound: Something that should not be missed. Got up early and drove to the sound through Acton and Te Anau. Lots of pretty views along the way and stopped at Lake Gunn to stroll through an unbelievably beautiful forest. I could well imagine people from Middle Earth moving through these forests at one time. Enchantment. Passed through Homer Tunnel (more like a hole drilled through a mountain). If you have claustrophobia, close your eyes and don’t think about it too much. We were very lucky and had a beautiful day for our boat ride though Milford Sound. The views are stunning (e.g., Mitre Peak, Bowen Falls); the captain took us to the bottom of the falls where we could enjoy the water spraying over us. Very cool and great fun indeed.

Lake Gunn Forest
Lake Gunn Forest creature making sure you are safe
Mitre Peak

Enjoying the mist of one of the Milford Sound waterfalls

Air Milford: We flew out of Milford Sound on Air Milford and I would highly recommend this. This shortens the time to get back to Queenstown by several hours, but more importantly Michael, our great pilot, gave us some very up close views of the rapidly vanishing glaciers and stunning views of the Fjord National Park from the air. This short trip really gave us a much better understanding of the landscape in this part of the world. Exquisite beauty.
Remember my hat in the selfie on the way to the south island. This particular hat has traveled with me to South Africa and Peru so I am a bit fond of it. Sadly, by accident, I left it on the Air Milford plane when we disembarked. Jen of Air Milford retreived my hat and took to our hotel on the same day, but through a series of miscommunications with the hotel staff, I was not able to get it. Now this gets interesting! I wrote a brief note to Air Milford inquiring about the hat. With their help, our guide, Andre’s help, and the staff at the hotel my hat was mailed back to me in the States. Remarkable! Just great people

Cruise boat at bottom of falls from an Air Milford flight

View of vanishing glaciers from an Air Milford flight

View of Fiordland National Park from an Air Milford flight
Dart River Boat: On our last day in New Zealand, we took a Dart River Boat. These are basically water jet boats that can travel at high speed in very shallow water (think adrenaline rush) and the Dart River offers spectacular views (unsurpassed beauty). Plan on getting wet, but not drenched, and having a lot of fun!

View of Dart River

A 360° heart stopping turn around on the river, water spraying everywhere

View of Dart River at the end of the trail
Photography Kit
I took 7 camera bodies with me on this trip, 2 Sony a7RII, 1 Sony a7R, 2 GoPro Hero 5 and two iPhones. The two a7RII Sony bodies were used extensively. The GoPro cameras proved very valuable in certain conditions, such as selfies, ziplining, capturing some video on Lake Tasman and the Dart River Boat ride. We also used the GoPro for selfies along with our iPhones. The Sony a7R with the 24-240 was used once and not worth they carrying weight.
Lenses: I took 6 different lenses: 28mm f2, 21mm adapter for the 28 mm f2 lens, 24-105 mm f4, 85mm f1.4, 24-240 f3.5-5.6, and a 70-200mm f4, all Sony E mount lenses. The vast majority of pictures where taken with the 24-105 f4 lens. The 70-200mm was rarely used and the 24-240 was not used at all. Occasional use was made with the 28mm f2 and the 85mm f1.4 lens particularly when light was challenging.
Miscellaneous items:
1. Eight Sandisk 64GB Extreme PRO USH II SDXC cards-I was able to keep a copy of the pictures on the cards, just in case I lost the pictures on my hard drive.
2. A LaCie 4 TB Rugged Raid (Thunderbolt/USB 3.0) partitioned as a 3.5 TB and a 0.5 TB partition. The smaller partition was a bootable version of my MacBook Pro Retina Display computer. The larger partition served as a backup of my primary picture storage drive, a 4TB Western Digital Passport Ultra USB 3.0 drive.
3. Retina Display MacBook Pro
4. Two Transcend Multicard readers
5. CamKix Wireless Bluetooth Camera Shutter Remote control for smartphones. I used the GoPro app on my iPhone for GoPro selfies. Both worked very well. I made sure I had tested these before leaving for the vacation.
6. GoPro 3-way grip, arm and tripod. This was an excellent choice. Gave a lot of freedom but was quite rugged.
7. Two Visibledust Zeeion sensor blower.
8. Three Ceptic USA to Australia, New Zealand…. Travel plug with Dual USB Type I
Hotels:
Below is the list of hotels we stayed. All of them were more than acceptable. All had buffet breakfasts that were quite acceptable. The rooms were clean, the staff friendly and helpful. You leave your luggage by your door and the porters transfer it to and from the Moatrek van. This made the day to day traveling much easier.
Auckland: Sebel Hotel-Auckland: Right on the harbor with lots of restaurants close by and great people watching. Very pretty. They had an in room laundry, refrigerator, microwave and small cooking area. We had a suite like configuration
Rotorua: Novotel Rotorua Lakeside: Right across the street from Tutanekai St with its many different restaurants.
Tongariro National Park: Chateau Tongariro-An older elegant hotel that has lots of charm. The dinner and wine were quite good.
Napier: Scenic Hotel Te Pania-Beautiful location along the ocean and an easy walk to the town. I think all the rooms have views of the ocean.
Wellington: Bolton Hotel Wellington-Suite like configuration and in room laundry and small kitchen. Very comfortable. The hotel restaurant provided good food and excellent service.
Nelson: Trailways-Adequate lodging with excellent location to enjoy Nelson.
Methven: Ski Time Lodge: Rooms in a dispersed cluster of buildings, separate from the main building. We had a nice dinner in their restaurant.
Aoraki Mt Cook Alpine Village: The Hermitage- Very nice facilities with beautiful views. Our dinner in the Panorama Room was very good.
Queenstown: Scenic Suites-Queenstown- A relatively large suite, with a kitchen, in room laundry, sitting area and separate bedroom. The room was very nice. The general room layout is irregular so it takes a while to understand how to get around the hotel. While the walk into the Queenstown city center is not very far, returning to the hotel requires a significant uphill walk.
Food: Overall it was ok to the good side, but with one or two exceptions, not gourmet.
Breakfast: All of them were buffet and quite acceptable. The only exception was The Sebel. It was order off the menu and was good.
Lunch: Ranged from bag lunch, to small cafes in small towns to a wonderful picnic lunch, such as Forrest Estate, or the spectacular gourmet lunch at Akaunui fixed by Di MacKenzie. Madam Woo in Queenstown was also extremely good.
Dinners: Generally, we were on our own for dinners and they were acceptable. Special note dinners: the dinner at Chateau Tongariro was above average with wonderful ambience. In Napier, the Hunger Monger had delicious food and wine. Our meal at the Artisan in the Bolten Hotel (Wellington) was also very good as was our dinner at the Ski Time Lodge. Both Bacco on Trafagar St in Nelson and Panorama Room in The Hermitage were very good and a wonderful dining experience.
If you have any questions, feel free to email me. I will do my best to give an honest answer.
Synology 2415+: network attached server for digital files
About mid July of this year, I realized that my current storage solution had reached a breaking point. With about 44TB of digital storage for both stills and video spread out over 3 Western Digital MyBook Duo drives and coming to grips with the fact that I was adding about 3.5-4TB of data every year, I decided I needed a fresh approach to the problem. This 44TB was backed up and archived on offsite drives as well so the total number of drives was rapidly increasing. My wife had a replicate copy of those 44TB sitting on her computer, but there was no backup of her drives (not great!).
There are about 363,000 digital stills and an unknown number of video files on external drives. The still digital files were all linked to two different Lightroom CC catalogs and the video files to two separate Final Cut Pro X libraries. My Lightroom catalog over time has diverged from my wife’s catalog, but the FCPX libraries had not diverged. This divergence creates some difficulties to think about.
Problem to be solved: Reduce the every expanding external devices with a limited amount of storage (16TB) available for individual external drives.
Current workflow: I use to shoot professionally, but now my time is spent mostly on photography of my family. My workflow has been very simple. I load new pictures onto a external WD passport drive (4TB) into a working Lightroom Catalog, once done editing I import the working LR catalog to a master LR catalog on one of my 16 TB My Book Duo. The 16 TB drives were backed up and archived (an additional 32 TB of storage space). I also move the working library on to a 16TB My Book Duo that was attached to my wife’s computer so she would have access as well.
After looking at the options and talking to a number of different people, I decided to build a network storage device (NAS). Presumably, such a device would allow me to substantially increase my storage capabilities, allow my wife and I to share the same set of digital negatives (so I would not need to replicate them) and have a single backup and archive copy of the NAS.
We have three computers: a 2011 iMac, a 2014 iMac and mid 2012 MacBook Pro (Retina display). These computers were linked to the external world via an Airport Extreme and Xfinity cable modem, but not really linked together. So for the NAS, I wanted to set up a local area network so all the computers could attach to the NAS.
HARDWARE: This is a list of the pieces of equipment I purchased to accomplish this goal:
1. A Synology 2415+: This is a 12 bay NAS and should satisfy my needs for a long time. But if not it can be expanded to another 12 bays using a DX1215. I also added a 4GB Synology DDR3 RAM Module (RAM1600 DDR3-4GB).
2. I populated the drive with 8 10TB Red Pro NAS-7200 RPM Class 6 Gb/s 3.5 inch drives.
3. For my switch I purchased a D-Link 8-Port EasySmart Gigabit Ethernet PoE Switch (DGS-1100-08P)
4. Cat 6a cable
5. An APC Back-UPS 1500VA Battery Backup (SMC1500) because I wanted to protect the system electrically.
The following items are directly connected to the D-Link: iMac, Synology 2415+ NAS, Airport Extreme. The cable modem is connected through the Air Airport Extreme. My wife’s computer and my MacBook Pro are connected wireless through the Airport Extreme.
SET UP: The physical configuration of these pieces was relatively straight forward and the manuals and/or online support was pretty clear. Initially, I formated the NAS initially as AFP, but learned later I should have formated it as an SMB drive. The reason was I wanted to open FCPX libraries residing on the NAS and that required a SMB formatted drive. This late learning cost me a fair amount of time as I need to rebuild the NAS.
Initial populating the NAS: This task required moving large amounts of data from my existing external drives to the NAS. Initially I tried to use Carbon Copy Cloner (CCC) but my previous work created two obstacles. First, my legacy was a migration from Aperture to Lightroom a couple of years ago and I had number of old Aperture Library just in case I might need them. It turns out those Aperture Libraries have a huge number of very small files and this has a hugely negative impact on trying to copy files over to the NAS. These old Aperture Libraries were unlikely to be important to me in the future. Second issue was I had a number of files with special characters in them: mainly a ‘?’. While that was ok on an AFP formated system, the special character was not allowed on an SMB formated system.
Eventually I was able to copy the complete content of my external drives over to the NAS by connecting my external drive to the USB ports of the Synology and using File Station to move them over. This allowed for transfer rates up to about 80-100 MB/s. But when I tried to create a backup of the NAS to a new drive (I wanted to save my original drives for a while) using CCC I received a number of errors. These errors only occurred in old iPhoto libraries or .aplibrary files and were only a couple of 100 files out of 10’s of thousands. All of the errors were Permission denial errors or special character errors.
After some discussion with Mike B of Bombich software and a fair amount of work on his part, he suggested to delete the offending files on the NAS and then copy a fresh version from the original source on the NAS. This worked! I am speculating that some file attributes were not copied with File Station, thus resulting in the denied permission, but I don’t really know.
LESSON LEARNED: make sure there are NO special characters in any of the titles of your files and avoid data structures that have LOTS of small files, like old Aperture Libraries. Another thing I learned was I could signficantly reduce the amount of files needed to be copied by simply cleaning of my original hard drive of data that I really no longer needed, but had retained ‘just in case’.
I now have three shared folders on my single volume NAS. One for my 2001-14 pictures, one for my 2015-xx pictures and one for all of my video content. I have been successful in backing up these shared folders without problem using CCC at roughly 30 MB/s. My Lightroom catalog resides on an external SSD drive on my computer, and a preliminary test suggest that my FCPX library will actually open and run from the NAS just fine (more on this later).
At this point, I discovered Smart Previews in Lightroom. These allow me to edit images without being attached to the original digital file. I did a small test and discovered that Smart Previews were roughly 1 MB in size and it really allowed me to edit the picture and allows me to post Facebook pictures and email pictures. My combined picture library (2001-14 and 15-xx) was 363,000 pictures so a 1 TB SSD drive could easily handle the complete Lightroom catalog, previews and smart previews!
At this point, I had to go back and create Smart Previews for all my pictures. Not because I needed them, but it is not uncommon for me to be traveling and someone wants to post a picture on FB or email it to a friend. NOW I have all of the pictures available!
LESSON LEARNED: If you want Smart Previews for your files, build those before starting your migration your originals to the NAS. Building Smart Previews with the originals on the NAS is not particularly fast.
Connecting my LR catalog and my wife’s catalog to the NAS: With my two separate LR catalogs, 2001-14 and 2015—xx residing on my SSD external drive, I made sure my original data files were disconnected. When I started up each catalog on the SSD, the folders showed a question mark, but I was able to use the find the folder function in LR and very quickly, my catalogues were now connected to the NAS folders. Once I had the individual catalogues connected to the NAS, I combined them into a single catalog and I had all 363,000 pictures in one catalog!
I repeated the process with my wife’s catalogs and since she had never changed the location of the original digital files, using an identical process, I was able to connect her catalogs to the NAS and combine them into a single catalog. I am connected via an ethernet cable, but she is only connected via WiFi. Her catalog is stored on an internal drive on a newer computer, but the speed of opening this large catalog is quite speedy and faster than my opening speed. I suspect that my bottleneck is going through USB 3.0 to my SSD external drive. CAVEAT: If either of us make changes to the processing of the images, those changes are NOT transferred to the other person’s catalog, but we can use the identical set of original digital files.
For pictures there was one last step: transferring new pictures into my catalog (originals sitting on the NAS) and then also transfer them to her catalog. For my catalog it was relatively simple. I opened my Master catalog (contained links to all 363,000 pictures) and imported the working catalog into the Master catalog while moving a copy of the original digital files onto the NAS into their proper location.
Moving the working catalog into my wife’s Master catalog required some additional steps.
1. Opened my wife’s Master catalog and imported the working catalog (remember this working catalog resides on a Western Digital Passport with the original digital files) BUT, and this is important, I did NOT move the original files (selected that during the import process), but left them in place
2. After the import process was completed, I closed my wife’s Master catalog and ejected the WD passport drive that contained the working catalog and primary digtial files. I then re-opened my wife’s Master catalog and as expected the recently imported catalog information had question marks, indicating that the link between the Master catalog and the original files had been broken. More importantly, the Master catalog showed the location to be the passport drive.
I then used the ‘Update Folder Location’ that is in the pop up menu with a right click on the folder. Using the dialog box, I navigated to the folder location on the NAS. When I did this the folder appeared as it should in my wife’s catalog with the parent folders properly displayed. I repeated this process for each remaining ‘lost folder’ and used the ‘Merge’ option.
At this point I had accomplished the following critical steps:
1. Moved my original files to the NAS
2. Created Smart Previews for all of my pictures (optional)
3. Moved my Lightroom catalogs to an external SSD drive (Mobile catalog)
4. Linked the Mobile Catalogs to the NAS original files
5. Consolidated the two large Mobile catalogs into a single MasterCatalog
6. Backedup the original digital files to a fresh backup drive using CCC (Backup and Archive strategy for the NAS now working)
7. Moved new pictures and edits into both my Master catalog and my wife’s Master catalog
FCPX AND VIDEO CONTENT
All of my video content was managed in a FCPX library. To move the original and rendered files over to the NAS was a relatively straightforward task.
1. I created a new library (MasterVideoLibrary) on my external drive that contained all of the managed video content, but instead of have the MasterVideoLibrary manage the content, I only wanted it to reference the original media so the MasterVideoLibary would be relatively small. I also wanted the orignal media on the NAS so all of our computers should access it, when needed. To accomplish this task, when I created the MasterVideoLibrary, I changed the location for storage by selecting the new MastervideoLibary, File—>Library Properties and a dialog shows up on the right side that looks like this:

By selecting Modify Settings under Storage Locations, I was able to set the storage location for media and Cache on the NAS in a folder called MasterVideoCollection. Once this was done, I simply dragged and dropped events and projects from my existing library (thus making a copy, but not moving them) into the MasterVideoLibrary. In this process, FCPX rearranges the media into a strict date created folder system. In the end, my MasterVideoLibrary was less than a GB of data pointing to the NAS for the 21250 original media files. This MasterVideoLibrary resides with my Master Lightroom Catalog on the SSD.
WORK FLOW CONSIDERATIONS:
For small editing projects, the speeds seems adequate to do some editing in FCPX with the original media residing on the NAS. However, for larger projects, I will create a new Working Library on a fast external drive and copy the files over to the Working Library by setting the location of the original and cache media to the external drive and dragging the events/projects from the MasterVideoLibary to the Working Library. Once my editing is done, I will copy the updated project and events back to the MasterVideoLibrary and then delete the content of the Working Library. I have discovered that if I do not directly touch the original media (that is only work through the FCPX window), when I copy back it does not add duplicate original media, but simply relinks to existing original media stored on the NAS. This copy back to the MasterVideoLibrary tends to happen very quickly and determined by how much new original media was added to the Working Library.
CONCLUSIONS:
1. Make sure your original external drives have been cleaned up before moving the data over to the NAS.
2. I would set the NAS as an SMB format, but that may be a personal preference.
3. Make sure there are no special characters in your file names.
4. If you use Lightroom and want to be able to edit while not connected to the original media files, set up Smart Previews before you start moving data over to the NAS.
5. The Synology 2415+ and other necessary pieces of hardware were relatively simple to set up.
6. Carbon Copy Cloner is an excellent backup tool. Learn how to use backing up individual folders in addition to whole drives. File Station can be used as well. Much to my surprise my Journaled HFS+ drive was visible when connected directly to the NAS. I had originally planned on directly connecting my back up drives to the NAS but did not like the backup solutions offered.
7. Have a step by step plan on the moving and organization before you start.
8. My final structure looks like this:
a. My MasterLightroomCatalog (384GB with all pictures with Smart Previews) and MasterVideoLibary (960MB) reside on a 1 TB external USB 3/USB C SSD drive from G-Technologies. There are 363,000 stills and 21,250 video files connected to the Master catalogs/libaries.
b. The original media is stored on a Synology 2415+ NAS as a RAID 6 equivalent redundancy.
c. The catalogs/libraries are connect to the Synology NAS via either hardware ethernet connect (my computer) or wirelessly for my wife’s computer or my laptop.
d. Speed of access for the Lightroom Catalog for my purposes is more than adequate and workable for FCPX access. Large FCPX projects will need to be checked out to a fast external drive Working Library for significant work projects.